Incoming Tide Polymer Clay Image Transfer Tutorial
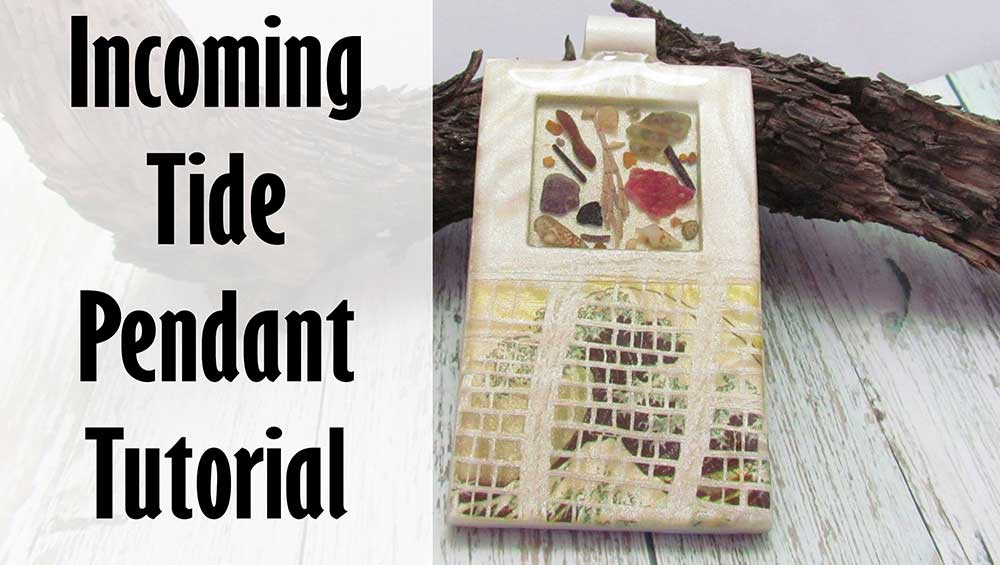
In this tutorial we will be having lots of fun with polymer clay image transfers. I'll show you how to use Lisa Pavelka's images, how to crackle them to achieve a mosaic effect, how to make a beautiful polymer clay bezel and much more.
This polymer clay image transfer tutorial is packed with useful tips and tricks, so make a nice cuppa and settle in for a really fun tutorial.
You will need the following supplies:
- Pearl white polymer clay (Premo)
- A tissue blade
- A pasta machine
- An acrylic roller
- A craft knife
- An oven
- Shell fragments
- Polymer Clay Image transfer
- A texture stamp (Oyster)
- Pendant Cutters
- Coarse Sandpaper
- Resin
- Liquid clay
- Wooden mandrel
- Readymade rubber cord
Incoming Tide Polymer Clay Image Transfer Step by Step
Creating The Bezel- To start with you will need a sheet of Pearl White Premo rolled out on the thickest setting of your pasta machine.
- Next, you need a texture stamp that you can use to make a mica shift. You can use any stamp that you like, preferably something beach themed. I will be using my Oyster Texture.
- Dust your stamp with cornstarch, and press your polymer clay sheet into your stamp until you have a good impression. Work from one side of the stamp to the other.
- Use your flexible tissue blade to shave off the raised portions of your texture to create a mica shift. Cover with plain printing paper and burnish using your figers or your acrylic rod. You can see more detail on how to do that in my Mica Shift Tutorial.
- Roll out a second sheet of Pearl White on the thickest setting and lay the mica shift on top. Trim away the excess clay.
- Cut out your chosen image transfer leaving a narrow border. My one is from Lisa Pavelka.
- Soak in water for about 3-5 minutes until the back turns translucent. Dab away the excess water. Slip the transfer onto the clay avoiding air bubbles as you go. (See the video for the process.)
- Allow to dry for about five minutes. Stretch the clay gently to check if it will crack. If it will, it is ready.
- Roll over with your acrylic roller, then pass it through the thickest setting on your pasta machine. Continue through the settings, changing the direction in which you are rolling the clay until you have enough of a crackle.
- Place your chosen cutter over your clay and line it up. I am using one of my statement rectangles today.
- Press down gently to create an outline. Place the smaller square cutter inside the rectangle symmetrically.
- Press down well on both cutters. Trim off using a craft knife.
- Place in the oven for 15 minutes to set, or use a heat gun at a medium temperature and low wind speed.
- Allow to cool.
- Carefully lift from your tile.
- Roll out another sheet of Pearl white on your thickest setting and lay your piece on top of it. Trim using your blade and lift from your tile. Place to the side, baked side down.
- Roll out another sheet of Pearl White on the thickest setting, place on a piece of plain paper and texture using coarse sandpaper.
- Place texture side down and lay your piece over the top.
- Trim again using your blade.
- Bake at the recommended temperature for an hour.
- Take a small piece of Premo Pearl white. Warm it up in your hands, and use it to smear along the sides of your bezel to clean it up and reduce the need for sanding later. See my Jessama Smear tutorial for more detail.
- Roll out another piece of Pearl white and trim out a long rectangle.
- Wrap the clay around a skewer or other cylinder to form a bail - see the video.
- Work it off gently and position at the top of your bezel pendant using a skewer to hold it and press it on.
- Add a small dab of Bake and Bond or translucent liquid clay on either side.
- Bake for around forty five minutes at the recommended temperature.
- Allow to cool.
- Mix up a small amount of resin. I am using Ice resin. See the video for the process. You can also use an Ice Resin Plunger to make it easier.
- Place your bezel on a silicone mat and fill the base with resin.
- Add your inclusions. I will be using shell fragments from my shop, but you can add whatever you like.
- Use a straw to blow the bubbles out of your remaining resin and pour over the inclusions to fill up the bezel.
- Pour the remainder of the resin over the transfer and pull out to the edges using a skewer.
- Use a straw to blow over the resin to pop the bubbles.
- Allow to cure for 12 to 24 hours.
Suggested links
Supplies
- Oyster Texture Stamp
- Statement Rectangle Cutters
- Square Cutters
- Shell Fragments
- Silicone Resin Curing Mat
If you are struggling with the Ice Resin, you can find a full Tips and
Techniques tutorial that walks you through the process on my Patreon community page or in my Etsy Shop.
If I have missed something, or you still have questions, please leave a comment below.
You can like my Facebook page or join the Jessama Tutorials Polymer Clay Community on Facebook to stay up to date with more polymer clay tutorials like this one as they are released.


Please leave your comments below: