You are here: Home >> Polymer Clay Surface Effect Tutorials > Alcohol Polymer Clay Crackle
Alcohol Polymer Clay Crackle Sheet Tutorial
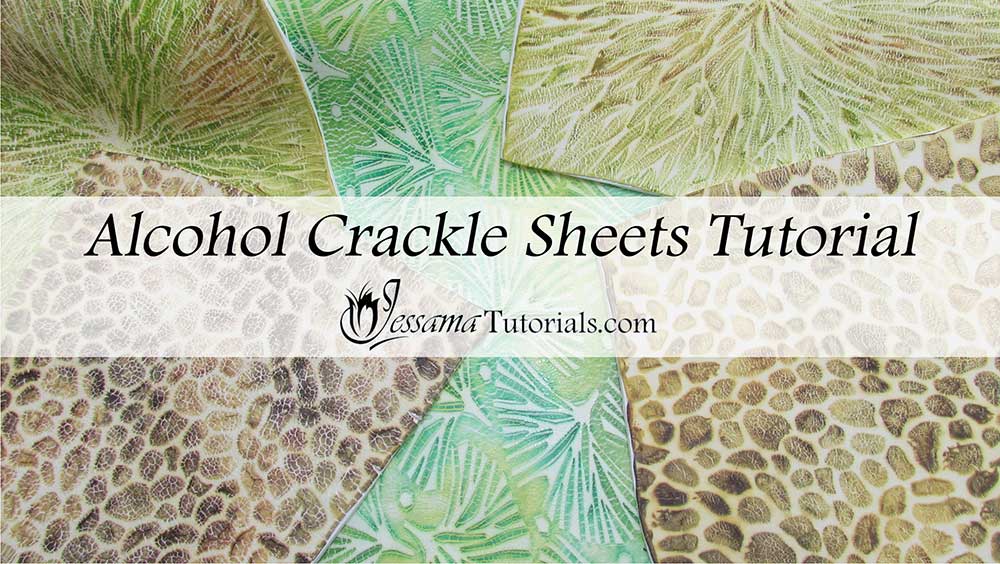
This is the first of a three part jewelry set tutorial. In part one I'll be showing you how to make three different alcohol ink polymer clay crackle sheets. This is one of my favorite polymer clay techniques. I'll be using it in other tutorials in the future to produce some other effects. It's a really useful, versatile technique.
The links to part two and three are in the suggested links box below the video.
You will need the following supplies:
- Alcohol ink (I’m using Bottle, Botanical, Meadow, Lettuce, Citrus, Caramel, Ginger, Teakwood, Espresso Adirondack inks)
- White polymer clay
- 99% Alcohol
- Texture stamps (I am using Helen Breil's Ginko, and my Enchanted Roots and Cobblestone.)
- A tissue blade
- A pasta machine
- An acrylic roller
- A brush
- A wet wipe
How to Make An Alcohol Polymer Clay Crackle Sheet Step by Step
Creating Your Textures- To start you’ll need 3 sheets of white polymer clay rolled out on the thickest setting of your pasta machine.
- Next you will need three different textures: Helen Breil's Ginko, and my Enchanted Roots and Cobblestone.
- Place your first stamp on your work surface and spray well with water or dust with cornstarch.
- Lay your polymer clay sheet over your stamp. Spray the top with water.
- Press the clay into your texture stamp using your fingers, working from one side of the stamp to the other to expel air bubbles and excess water.
- Roll over carefully using your acrylic roller. Stop immediately if you see your clay begin to lift. If you continue you will end up with a ghost image.
- Lift the clay carefully from the texture stamp to reveal the pattern.
- Dry your clay and work surface.
- Trim the edges of your clay to neaten it up.
- Repeat with your other two textures.
-
I will be using Adirondack Alcohol inks to color my veneers in the following colors:
- Ginko - Bottle, Botanical, Meadow
- Enchanted Roots - Citrus, Lettuce, Caramel
- Cobblestone - Ginger, Teakwood, Espresso
- We will start with the Ginko. Use a brush to spread drops of your ink randomly over your clay. You need quite dark colors and quite good coverage. It doesn't matter if your colors overlap or mix. Continue until your clay is covered.
- Repeat for the other two textures.
- Leave for at least ten minutes so that the ink can sink in and stain the clay.
- Take your first sheet and give a good spray with 99% alcohol. Lay a wet wipe over and soak it up. Repeat a few times. Each time you spray, the alcohol is drying out the clay.
- Use your wet wipe to rub over the top to remove the top layer and expose the white clay. Spray and rub until you are happy with your exposure.
- Leave the clay to dry completely.
- Repeat with the other two textures.
- Start with the Ginko sheet and gently stretch it out between your fingers to get the crackle started.
- Flatten your sheet out using a roller.
- Roll out another sheet of white clay and use as a backing for your textured clay so that you can continue to stretch it. Trim up the edges.
- Run through the thickest setting on the pasta machine to create the crackle.
- Repeat with the other two sheets.
- If your clay doesn't crackle, just go and spray it a few more times with the alcohol to dry out the clay a bit more then stretch again.
- Leave the clay to dry completely.
- Repeat with the other two textures.
Suggested links
- Enchanted Roots Texture Stamp
- Cobblestone Texture Stamp
- Part Two - Faded Summer Cuff
- Part Three - Faded Summer Fan Necklace
If I have missed something, or you still have questions, please leave a comment below.
You can like my Facebook page or join the Jessama Tutorials Polymer Clay Community on Facebook to stay up to date with more polymer clay tutorials like this one as they are released.
You may also like:
You are here: Home >> Polymer Clay Surface Effect Tutorials > Alcohol Polymer Clay Crackle


Please leave your comments below: