African Fabric Geometric Cane Tutorial
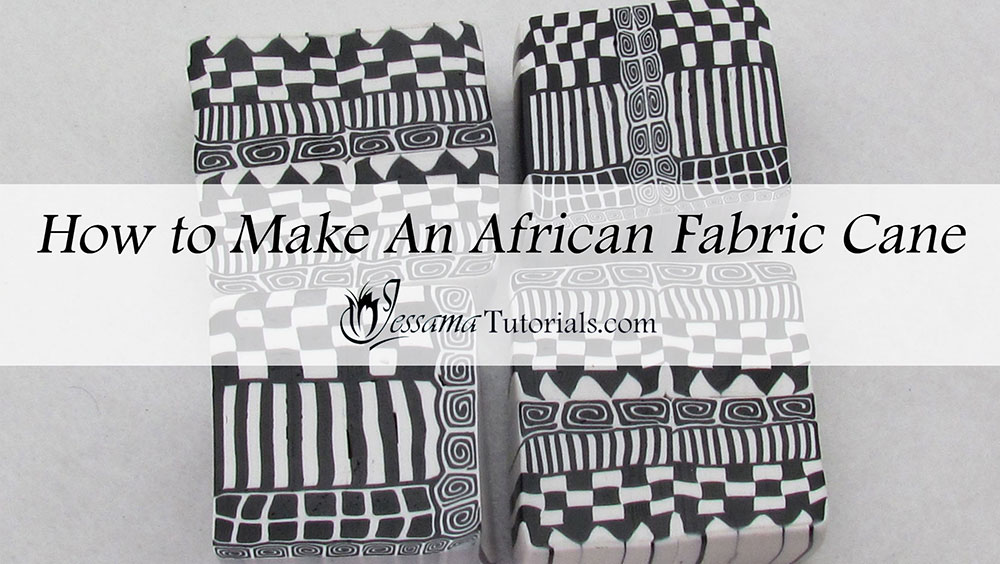
In this tutorial I'll be showing how to make a geometric cane inspired by African fabric patterns. It’s a really simple polymer clay cane project. Perfect for those just getting started with polymer clay canes and great fun.
This tutorial is part three in the series where I’ll show
you how to combine simple polymer clay canes into one project to create a complex cane. In part one and two, I showed how to make a checkerboard cane and a striped cane. Now
I’ll show how to make a spiral or jellyroll cane and a square honeycomb cane using squared up bullseye canes, and how to combine these into the African Fabric Cane.
You will need the following supplies:
- Black and white clay (I’m using Kato)
- A checkerboard cane
- A stripe cane
- A tissue blade
- A pasta machine
- An acrylic roller
Steps To Making A Polymer Clay Geometric Cane Inspired by African Fabric Patterns
- The first step is to get all of your polymer clay and simple canes ready.
-
You will need a black and white Checkerboard Cane. Mine is a six by four cane.
See this tutorial to find out how to make a Checkerboard Cane.
-
You will need a black and white Striped Cane. It needs to be around the same width as the checkerboard. If they are different sizes, just reduce the narrower cane until it is wide enough to match the other one.
See this tutorial to find out how to make a Striped Cane.
-
You will need a black and white Jellyroll or Spiral Cane.
See this tutorial to find out how to make a Jellyroll Cane.
-
Finally, you will need a black and white Bullseye Cane. Mine has a black center and a white edge.
See this tutorial to find out how to make a Bullseye Cane.
- Next, you need a sheet of black polymer clay rolled out on the thinnest setting of your pasta machine.
- The next step is to create the Square Honeycomb Cane using the Bullseye Cane that you made earlier.
- Reduce the Bullseye Cane until you can cut fourteen pieces from it that are the same length as the narrow side of your checkerboard and striped cane.
- Cut out your pieces and square each one up using your fingers.
- Place seven pieces side by side, and place the other seven pieces on top to create a second layer. Reduce this square honeycomb cane until it is the same width as the striped and checkerboard canes.
- Now we are ready to begin assembling the more complex Geometric Cane.
- Place a layer of black clay over your checkerboard cane. Smooth it out to remove any air bubbles and trim the edges.
- Stack your striped cane on top of the black layer so that the stripes are perpendicular to the checkerboard.
- Place a layer of black clay over your striped cane. Smooth it out to remove any air bubbles and trim the edges.
- Stack your square honeycomb cane on top of the black layer.
- Turn your geometric cane on its side and place a layer of black clay along the top to cover all three canes. Smooth it out to remove any air bubbles and trim the edges.
- Reduce your jellyroll cane until you can cut a good few pieces from it. Cut the pieces so that they are the same length as the narrow width of the new top of the geometric cane.
- Lay your jellyroll pieces next to each other along the top of your cane over the black layer.
- If you have enough pieces leftover, you can repeat this process on one of the other sides of the cane.
- And that's your Geometric African Fabric Cane assembled.
- Squish the cane so that all the pieces are stuck together and start reducing by laying the cane on its side and rolling with the acrylic roller. Rotate and roll through all the sides, continuing until the cane is reduced to the size you want. If the ends bow out, just place the cane end down on your work surface and push the top flat with your hand or an acrylic block.
You can leave the cane as it is, or you can cut it in half and join two pieces together side by side in any combination you want to create a more complex pattern.
suggested links
- Part 1 - Checkerboard Cane
- Part 2 - Striped Cane
other canes
If you need more information on reducing your canes, take a look at my reducing polymer clay canes tutorial, where I show how to reduce round, square, triangular and hexagonal canes correctly.
If I have missed something, or you still have questions, please leave a comment below.
You can like my Facebook page or join the Jessama Tutorials Polymer Clay Community on Facebook to stay up to date with more polymer clay tutorials like this one as they are released.


Please leave your comments below: