Polymer Clay Checkerboard Cane Tutorial
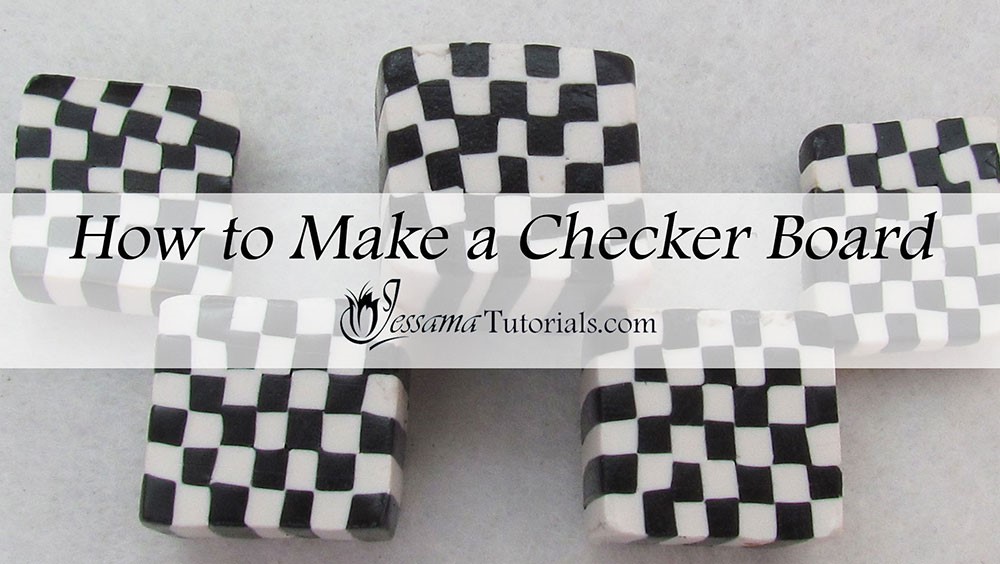
In this tutorial I’ll be showing a basic black and
white checkerboard. The checkerboard
cane is an important basic polymer clay technique that is often used in combination with other techniques in more complex projects and canes.
This polymer clay tutorial is part one of three in my
African Fabric Inspired Cane series. The links to the rest of the series are in the suggested links box below the video.
You will need the following supplies:
- Two polymer clay colors of your choice (I’m using black and white Premo)
- A ruler or Kato Marxit
- A tissue blade
- An acrylic roller
- A pasta machine
Steps To Making A Polymer Clay Checkerboard Cane
- Start with a sheet of black polymer clay and a sheet of white polymer clay, both rolled out on the thickest setting on your pasta machine.
- Cut the two sheets in half and stack so that you have a black sheet and a white sheet, both double the thickest setting on your pasta machine.
- Trim away any distorted edges.
- Measure the thickness of your sheets using a ruler. In my case they are 6mm thick.
- Using your ruler, mark your clay sheets into strips the same width as the height of your sheet. (In my case 6mm).
- Cut your sheets into strips following the markings.
- You should now have a number of polymer clay planks in each color. (In my case they are 6mm by 6mm)
- Lay four or more planks side by side alternating between black and white.
- Now place another layer on top, making sure to place white over black and black over white.
- Continue doing this until you have created a cane of the desired size. I went up three layers so that I had a three by four polymer clay cane.
- If you turn the block on its end you will be able to see the checkerboard effect.
- Once you are happy with the cane gently press the planks together with your fingers along each of the four sides of the cane.
- Start reducing slowly by rolling alternately along each of the four sides with your roller. This will also push out any air bubbles.
You can vary the appearance of your cane by adjusting the initial thickness of your sheets to create bigger or smaller planks, or by changing the colors. Strictly speaking a checkerboard should only consist of two colors, but rules are made for breaking, so go ahead and experiment with any number you like.
Click here to see part two in the series - the Striped Cane.
Click here to see part three in the series - the African Fabric Geometric Cane Tutorial.
suggested links
- Part 2 - Striped Cane
- Part 3 - African Fabric Geometric Cane
If you need more information on reducing your canes, take a look at my reducing polymer clay canes tutorial, where I show how to reduce round, square, triangular and hexagonal canes correctly.
If I have missed something, or you still have questions, please leave a comment below.
You can like my Facebook page or join the Jessama Tutorials Polymer Clay Community on Facebook to stay up to date with more polymer clay tutorials like this one as they are released.


Please leave your comments below: