Evening Rose Cane Polymer Clay Tutorial
In this polymer clay
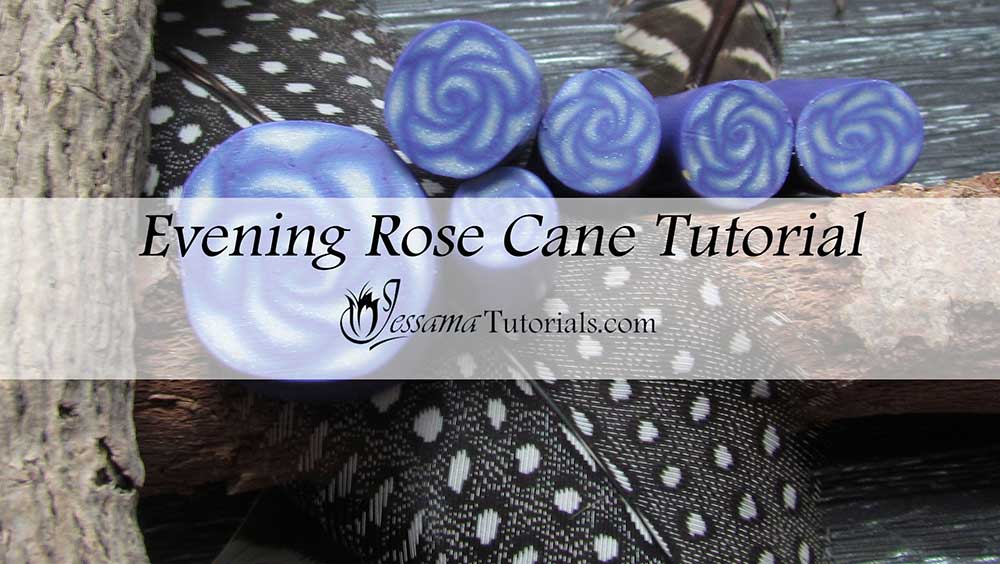
tutorial I’ll be showing you how to make an easy, stylized rose cane. It's a simple, fun way to get the effect of a rose without a lot of messing around with color blending, so it's great for caning beginners or people who just don't enjoy the fussing that is necessary with some polymer clay canes. I'm calling mine an evening rose because of the colors, but you can use any colors you like for this project.
This polymer clay tutorial incorporates a 3 part Skinner Blend and a Skinner Blend Bulls Eye Cane. If you haven't
made these before, you'll need to watch the tutorials linked in
the box after the video before you watch this one.
You will need the following supplies:
- Periwinkle, purple and pearl white Premo
- A tissue blade
- A pasta machine
- An acrylic roller
- A craft knife
- A piercing pin
- Skinner blend triangles
Steps To Making A Polymer Clay Evening Rose Cane
- Before you start your project, you’ll want to match up the colors you’ll use for your rose cane with some pebeo paints, because this is the first part in a two part series. If you want to use the clay colors I am using, I recommend the following paints: Ash Blue prisme, Eggshell White prisme, Metal Blue moon.
- The next step is to get all of your polymer clay ready.
-
You will need to mix up two color recipes:
- Color 1: 19 periwinkle, 2 purple
- Color 2: 6 periwinkle, 2 purple
-
You will need a Skinner Blend of Pearl White, Periwinkle and the first color recipe, blending from one to the next in that order.
See this tutorial to find out how to make a Three Part Skinner Blend.
In this tutorial I show how to use my three part Skinner blend triangle to make this process super easy. You will need two sheets made with these triangles, placed on top of one another and then run through the thickest setting of the pasta machine. - Once you have your blend turn it into a Skinner blend bulls eye cane. Roll from the pearl white to the mixed color.
- Wrap a 1 mm thick sheet of the second mixed color around the bulls eye cane. (In the video I did this later because I changed my mind about the cane.)
- Reduce your cane until you can cut out 16 parts. We’ll only need 11, but it’s best to have some back ups. Trim off your ends.
- Take 1 of your 16 parts and flatten it. Then taper the one edge so that when you cut the cane into slices it will have a teardrop shape.
- Take that and roll it up like a jelly roll starting from the tapered end. If you cut the cane now it should look like a spiral in each slice.
- Take another 5 pieces and flatten and taper them like you did the first.
- Take one of these pieces and place it around the jelly roll piece. It won’t go the whole way around.
- Take another piece and have the fat side of the taper overlap slightly the thin end of the last piece you placed on the jelly roll center. Carry on doing this until you’ve wrapped the 5 pieces around the jelly roll.
- Gently press it together.
- Now take another five pieces and squish them into flattish triangles. Place each of these triangles, point down into the five gaps in the cane. This should result in a round cane.
- You then go with a piercing pin to mark the outside of the cane to get the appearance of frilled leaves.
- Reduce the cane down to the size you wish and you’ll now have a beautiful rose cane.
suggested links
- How to Make a 3 Part Skinner Blend
- 3 Part Skinner Blend Made Easy
- Skinner Blend Bulls Eye Cane Tutorial
- Skinner Blend Triangles
- Part Two - Evening Rose Necklace
If you need more information on reducing your canes, take a look at my reducing polymer clay canes tutorial, where I show how to reduce round, square, triangular and hexagonal canes correctly.
If I have missed something, or you still have questions, please leave a comment below.
You can like my Facebook page or join the Jessama Tutorials Polymer Clay Community on Facebook to stay up to date with more polymer clay tutorials like this one as they are released.



Please leave your comments below: