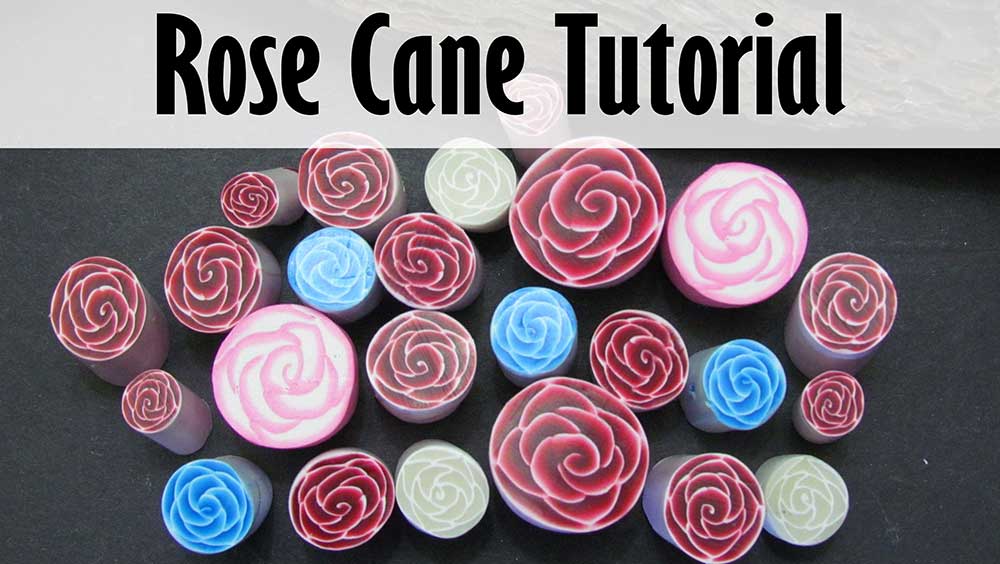
Polymer Clay Rose Cane Tutorial
In this polymer clay
tutorial we’ll make a realistic polymer clay rose cane using
Premo Sculpey clay.
The technique shown is easy to follow. It's a great cane technique for
beginners in polymer clay as there’s no packing with translucent clay required.
You can use this cane in many different projects, changing up the colors for different effects. The rose cane is simple and easy to master, but wonderfully versatile and beautiful.
You will need the following supplies:
- Alizarin Crimson, Pomegranate and White Premo
- A tissue blade
- A pasta machine
- An acrylic roller
Steps To Making A Polymer Clay Rose Cane
- The first step is to get all of your polymer clay ready.
- You will need to make up a four part skinner blend using 2 triangles of Alizarin Crimson, 1 Pomegranate and 1 White. I used about 1 and a half small blocks in total.
-
See this tutorial to find out how to make a Three Part Skinner Blend. For the blend in this tutorial, just add an extra triangle.
In this tutorial I show how to use my Skinner blend triangles to make Skinner Blends super easy. For the Skinner Blend in this tutorial, use the four part blend cutter. - Once you have your blend, fold it in half and in half again. Then run the clay though your pasta machine to create a long, thin blend.
- Turn it into a Skinner blend plug starting from the dark side of the blend.
- Reduce your cane until you can cut out about 13 parts of three quarter inch each. Trim off your ends.
- Cut out 13 parts.
- Take the first piece and flatten it and then pinch into a point on one side. Roll the thin side towards the thick side with the red facing up to make a jellyroll. This will be the center of the rose cane - put it to the side.
- Take the other pieces and flatten into flat semi circles.
- Take one of these pieces and place it around the jelly roll piece. It won’t go the whole way around.
- Take another piece and lay it under the end of the first piece and press it down. This will create your first layer.
- Start the next layer by placing the first piece over one of the seams. Continue around until you have used all your pieces. Make sure you always move in the same direction.
- See the video for the correct process.
- Reduce the cane down to the size you wish and you’ll now have a beautiful rose cane.
suggested links
- Part two - Queen of Hearts Polymer Clay Tutorial
- Skinner Blend Tutorial
- Skinner Blends Made Easy
- Skinner Blend Plug Tutorial
- How to Make Natasha Beads
- Simple Evening Rose Cane
- Translucent Rose Cane in Blooming Flowers Tutorial on Etsy
If you need more information on reducing your canes, take a look at my reducing polymer clay canes tutorial, where I show how to reduce round, square, triangular and hexagonal canes correctly.
If I have missed something, or you still have questions, please leave a comment below.
You can like my Facebook page or join the Jessama Tutorials Polymer Clay Community on Facebook to stay up to date with more polymer clay tutorials like this one as they are released.



Please leave your comments below: