You are here: Home >> Polymer Clay Surface Effect Tutorials > Mica Frills
Polymer Clay Mica Frills Tutorial
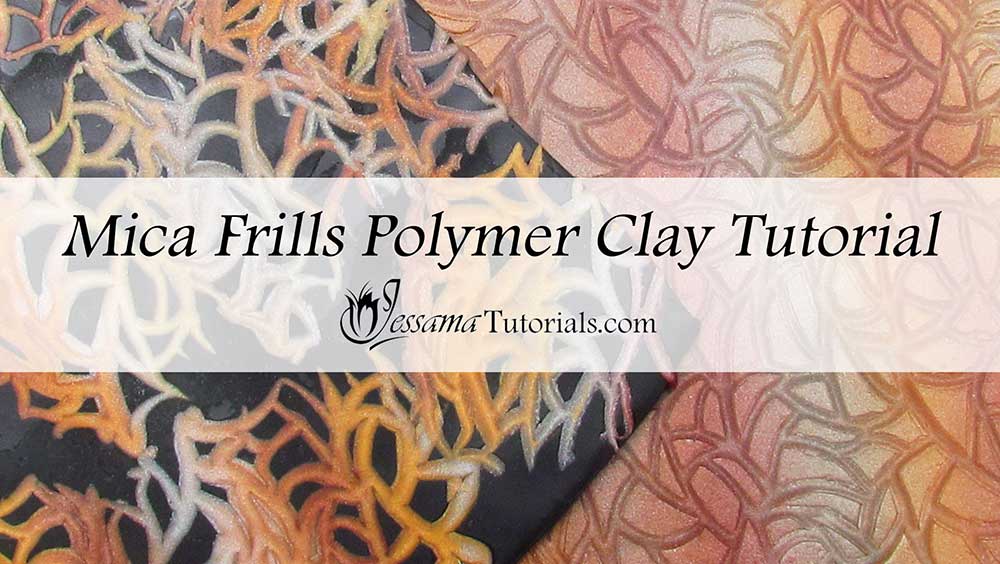
The polymer clay mica frills technique and marbled Skinner Blend in this tutorial can be used with metallic, opaque and even translucent clays. It's super cool and enhances any polymer clay project.
In this video I'll be using Kor rollers to create the indented pattern. Because the Kor rollers make such deep impressions, the resulting texture is easier to shave. This makes it perfect for the mica frills technique.
You will need the following supplies:
- Metallic polymer clay (I’m using Premo Silver, Gold, 18k Gold, Antique Gold, Copper, Pearl White)
- Premo Black Polymer Clay
- A Texture (I'm using the Winter Frost Kor Roller)
- A tissue blade
- A pasta machine
- An acrylic roller
How to Make Marbled Skinner Blend Polymer Clay Mica Frills
-
To start with you’ll need metallic clay. Today I’ll be using Premo Silver, Gold, 18k Gold, Antique Gold, Copper and Pearl White.
You can use any colors for the mica frills technique, but the mica shift part of the tutorial will only work with metallic clay.
- Condition and roll each color through the thickest setting on your pasta machine.
- Cut a few narrow strips from each sheet.
- Lay these strips next to each other swapping from one color to the next. It doesn’t matter which colors go with which. Just use a random pattern.
- Trim away any loose ends.
- Roll over the strips to form it into one sheet. Now fold the sheet in half so that the colors don’t cross over one another, but rather stay in their own lanes. A little bit of cross over is okay.
- Push your sheet together a bit with your fingers to stick it all together.
- Run this through the pasta machine fold side down. Repeat the fold and run though the machine again. Do this over and over again until you’re happy with your marbled blend.
- Now use your Kor Roller to roll across the surface of your blend.
- You can also create your texture using a texture stamp. You are looking for a lacy type pattern with open areas surrounded by lines that are all joined up so that you can shave the raised area off in one piece.
- Gently shave off the raised areas using your flexible blade. The trick is to get a lace like shaving with lots of holes in it where the pattern was deep.
- Carry on doing this until you have enough polymer clay mica frills. Lay them on a piece of paper as you go to keep them from sticking to themselves and each other. See the video for a few tips on how to get this technique right.
- This will leave a mica shift if you’re using metallic clay. Flatten it out with your acrylic roller and keep the sheet for later.
- The mica frills can be placed on any backing you want. I wanted to place them on black to create a striking polymer clay veneer. See the video for the process.
Suggested links
- How to Make a Skinner Blend
- How to Make a Mica Shift
- Alcohol Ink And Mica Frills Necklace Tutorial
- Kor Rollers Review
- Buy Kor Rollers from LindasArtSpot
If I have missed something, or you still have questions, please leave a comment below.
You can like my Facebook page or join the Jessama Tutorials Polymer Clay Community on Facebook to stay up to date with more polymer clay tutorials like this one as they are released.
You may also like:
You are here: Home >> Polymer Clay Surface Effect Tutorials > Mica Frills


Please leave your comments below: