You are here: Home >> Polymer Clay Beads Tutorials > Heart of the Ocean Lentil Beads
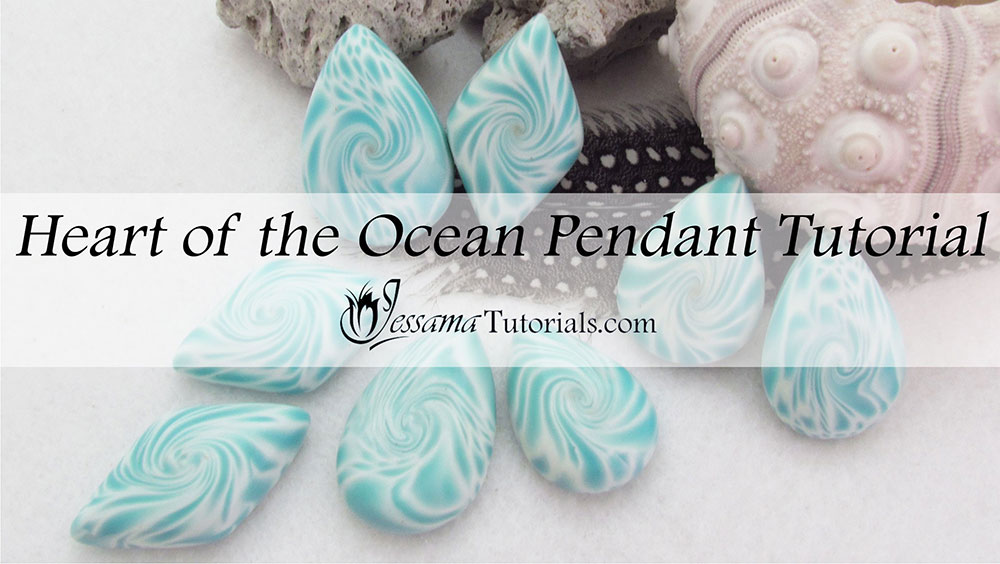
Heart of the Ocean Polymer Clay Lentil Bead Tutorial
In this tutorial I’ll
show you how to make polymer clay lentil beads using scrap cane ends. This
technique is great fun and can be done using any clay, but I find that cane
ends really make the pendants pop.
I’ll also show a cool technique to
turn lentil beads into flat or domed pendants. This is super easy and makes
sanding so much easier. It also means more possibilities in bead shapes and
stringing options.
You will need the following supplies:
- Scrap cane ends or slices (I'm using cane ends from my Pool Water, Cherry Blossom and Coral Cane Tutorials)
- A tissue blade
- An acrylic roller
- A square glass or plastic sheet
- An oven
- Wet/dry sandpaper or polishing cloths
- Renaissance wax
How to Make Polymer Clay Lentil Beads Step by Step
-
To start you’ll need some cane ends.
I'm using cane ends from my Pool Water, Cherry Blossom and Coral Cane Tutorials.
- Gently press and squish your cane ends into a ball. Try to get the best pattern you can. You could also use slices of cane in the project too. Just place the slices over a ball of white clay and roll into a ball.
- Once you have your ball of clay, place a square sheet of glass, or in my case an embossing folder, on top of your ball. Gently start rotating the sheet in circles. Don’t press too hard on the ball of clay underneath. Keep your hands resting on your work surface to keep your sheet at a consistent height while rotating.
- You’ll notice that as you rotate, the ball slowly forms into a lentil. The larger your circles the more pointed the lentil will be. The smaller your circles the flatter your lentil. Try to get something in between this. See the video for the process.
- You always want to rotate in the same direction while creating a lentil bead. If you change direction you’ll mess up your swirl.
- Continue with these steps until you’re happy with your lentil bead. This technique takes some practice to master, so don't worry if you don't get a perfect result straight away. Just keep practicing. Maybe start with some scrap clay that you can't do anything else with, until you have improved your technique.
- Once happy, press down on the point of the lentil to flatten it. Now you can mold it into a pendant shape of your choice. I chose a teardrop, triangle and diamond. See the video for more on the molding process.
- Once happy with your shapes bake them for a full hour at your clay's recommended temperature.
- Sand, buff and drill.
Suggested links
- Pool Water Cane Tutorial on Etsy
- Cherry Blossom Tutorial on Etsy
- Coral Cane Tutorial on Etsy
- Pool Water, Cherry Blossom and Coral Cane Tutorial on Patreon
If I have missed something, or you still have questions, please leave a comment below.
You can like my Facebook page or join the Jessama Tutorials Polymer Clay Community on Facebook to stay up to date with more polymer clay tutorials like this one as they are released.
You may also like:
You are here: Home >> Polymer Clay Beads Tutorials > Heart of the Ocean Lentil Beads


Please leave your comments below: