You are here: Home >> Polymer Clay Earring Tutorials > Modern Art Polymer Clay Earring Tutorial
Modern Art Polymer Clay Earring Tutorial
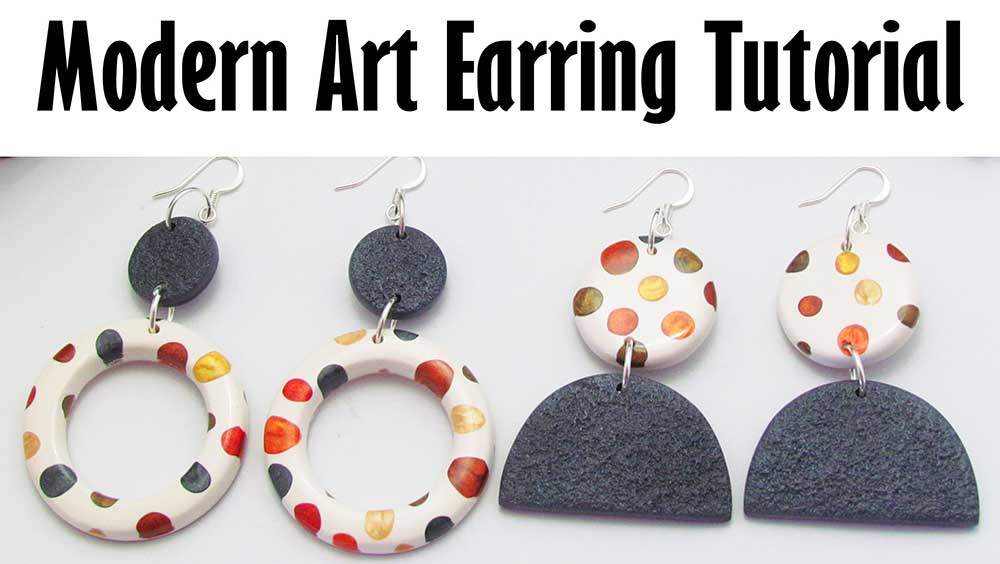
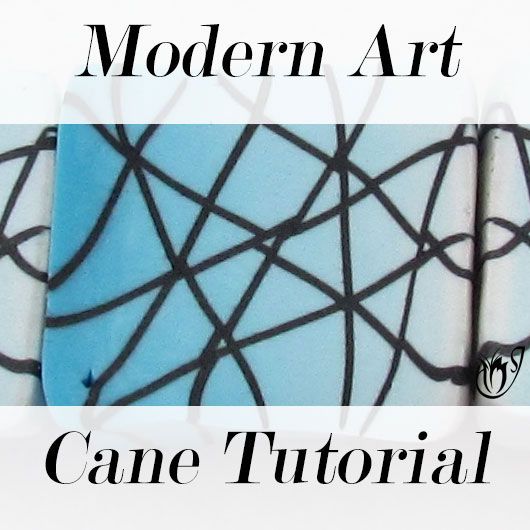
This polymer clay earring tutorial is a fun and easy take on a set of modern art earrings. The technique is simple and quick, but the result is beautiful and eye-catching.
There are lots of tips and tricks in this polymer clay tutorial, from keeping your white clay clean, all the way through to sanding and buffing this simple design to a high shine that really makes the colors pop.
You will need the following supplies:
- Pearl white, black and white Premo
- Cernit metallic (Copper, antique bronze, hematite, champagne, gold, rust, bronze)
- Tissue blade
- A pasta machine
- An acrylic roller
- An oven
- Deli paper
- Texture stamp (sand)
- Cutters (donut cutter, circle cutter, semi oval cutter)
- Sandpaper
- Polishing papers
- A buffing wheel
- Jumprings
- Pliers
- Earring wires
- A pin drill
- Renaissance wax
My Modern Art Polymer Clay Earrings Tutorial Step by Step
Part One: Going Dotty- To start you’ll need a sheet of white clay rolled out on the thickest setting of your pasta machine.
- Measure the clay out using your chosen cutter and trim away any excess so as not to waste any.
- You will also need some metallic clays. I am using Cernit today (Copper, antique bronze, hematite, champagne, gold, rust, bronze).
- Roll out some little balls from each color and lay on your work surface.
- Clean your hands well then randomly dot the metallic clay over your white sheet.
- Cover with a piece of Deli paper. Press down with your fingertips on each piece.
- Lift your deli paper, flip it over and burnish using your hand. Finish off with the roller.
- Roll out a sheet of pearl white at about 1mm. Lay it on your tile and lay your dotted sheet over it. Burnish together and press firmly onto the tile.
- Cut your earring pieces out using your chosen cutter. I am using my smallest number 5 donut from my Etsy shop.
- Smooth over any fingerprints.
- I am setting my pieces using a heatgun so that the shape doesn't distort when I move it. You can also do this by placing your pieces in the oven for 15 minutes.
- Leave to cool.
- Once cool lift up your pieces, carefully scraping away any left overs.
- Smooth the edges with your fingertips.
- I'm going to be making two pairs of polymer clay earrings. One using the donuts and the other using the circle centers.
- Roll out a sheet of Hematite Cernit Metallic on your thickest setting and burnish it onto your tile.
- Texture using a texture of your choice. I am using my sand texture.
- To go with the dotty rounds I am going to cut out two half ovals using my half oval cutters.
- To go with the donuts I am going to cut out two small circles using the largest cutter from my mini circle set.
- I am setting my pieces using a heatgun so that the shape doesn't distort when I move it. You can also do this by placing your pieces in the oven for 15 minutes.
- Leave to cool.
- Once cool lift up your pieces, carefully scraping away any left overs.
- Smooth the edges with your fingertips.
- Press down onto a piece of deli paper. Flip it over and use your fingertips to burnish until smooth.
- Bake all of your pieces on the deli sheet for an hour at your brand's recommended temperature.
- Roll out a sheet of black clay to about 1mm thick and stick your Hematite pieces onto it.
- Trim around using your craft knife and remove the excess.
- Smooth the edges with your fingertips and smooth away any fingerprints.
- Bake again for half an hour at the brand's recommended temperature.
- Sand the fronts, backs and sides well with wet/dry sandpaper starting from a 400 up to a 1200 grit. Then Finish off with polishing papers sanding from 400 all the way up to 8000.
- Buff your pieces using a rotary buffing tool, or a soft polishing cloth.
- Apply a light layer of Renaissance wax to each piece and buff again.
- Use a pin drill to drill a hole through your half ovals near the top.
- Position your small dotty circles next to the half ovals and find the right spot to drill through your circle pieces.
- Drill again through the opposite side of the circles for the earring wire.
- Use a pin drill to drill a hole through the top of each donut.
- Position your small Hematite circles next to the donuts and find the right spot to drill through your circle pieces.
- Join your donuts to your small hematite circles using jumprings. Add an earring wire to the top using another jumpring.
- Repeat for the other earring pair.
Suggested links
- Donut Cutters
- Mini Circle Cutters
- Half Oval Cutters
- Sand Texture Stamp
- Polishing Papers
- Buffing Wheels
- Pin Drill
- Deli Paper
- Where to Buy Cernit Metallics
If I have missed something, or you still have questions, please leave a comment below.
You can like my Facebook page or join the Jessama Tutorials Polymer Clay Community on Facebook to stay up to date with more polymer clay tutorials like this one as they are released.
You may also like:
You are here: Home >> Polymer Clay Earring Tutorials > Modern Art Polymer Clay Earring Tutorial


Please leave your comments below: