You are here: Home >> Polymer Clay Earring Tutorials > Black Poppy Polymer Clay Earring Design
Black Poppy Polymer Clay Earring Design
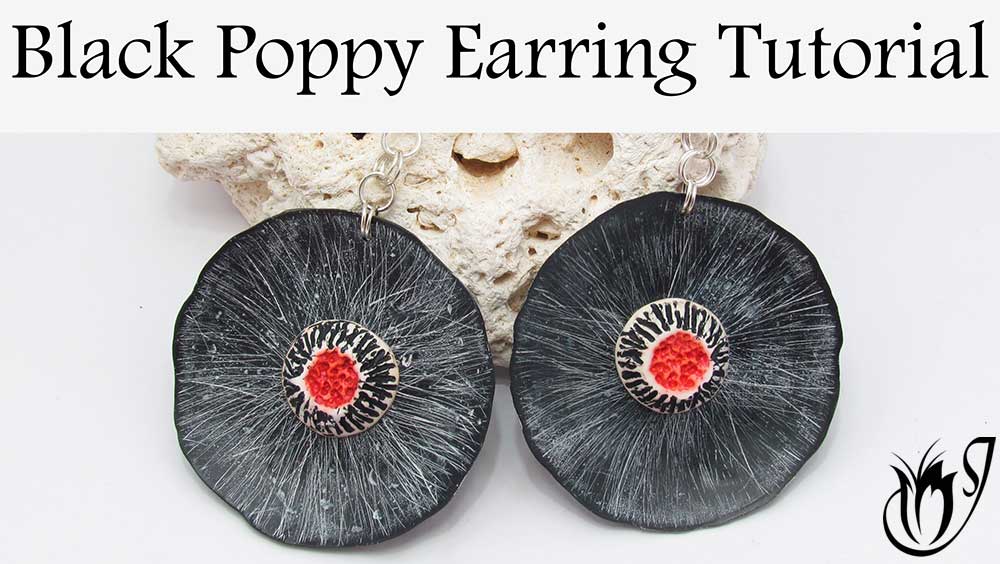
In this polymer clay tutorial I'll be showing you how to create this Black Poppy polymer clay earring design. It's an organic, easy design, great for beginners, filled with little tips and tricks for everyone to enjoy, and great fun to make.
The techniques in this design are simple and versatile, making this polymer clay design perfect for experimenting with different shapes and colors to create your own unique pieces.
You will need the following supplies:
- Black and white polymer clay (Premo)
- Ball tools
- Doming tools
- An oven
- Red mica powder
- Translucent liquid clay
- A brush
- White, black paint
- Sanding paper/ polishing papers
- Coarse sanding paper
- A heatgun (optional)
- A pin drill
- Silver Jumprings (6mm rounds)
- Silver ear wires
- Pliers
- Liquitex matt varnish
My Black Poppy Polymer Clay Earring Design Step by Step
Creating the Elements of the Black Poppy Polymer Clay Earring Design- To start you’ll need two pieces of Black polymer clay, roughly the same size.
- Press each piece into a random, organic round shape.
- Place smooth side down on a round doming tool and smooth down with your fingers.
- Bake for 30 minutes at your brand's recommended temperature.
- For the next step you need four equally sized balls of white clay.
- Use your fingertips to press each ball into a cone shape.
- Use a ball tool to flatten the peaks into dotted craters and to create streaks down the sides of the domes.
- Use a soft brush to color the centers with red mica powder.
- Bake for 30 minutes.
- After baking remove the black rounds from the doming tool.
- Antique the sides of the domes with black paint - use a small brush to paint the sides of each dome making sure to get into the cracks. Allow to dry, then use a wet wipe to remove some of the paint. You can also use a polishing cloth if you want to remove more paint.
- Use your polishing cloth to gently sand each red crater to bring out the texture.
- Use a piece of coarse (40 grit) sandpaper to scratch your black rounds on the side where the rims are pointing up. Go all the way around scratching from the center outwards to create a radial pattern.
- Repeat the previous antiquing process, using white paint this time. Make sure to sand well around the edges to create a black border.
- Smear a light layer of translucent liquid clay on the back of each black piece and set with a heat gun using the hottest setting.
- Once properly set, add a small drop of translucent liquid clay in the center of the front of each black piece then place one of your cones in the center of the earring.
- Bake for 30 minutes at the recommended temperature.
- Use a matte varnish to coat the fronts and backs of each earring. I am using Liquitex Matte Varnish. Make sure that your brush is wet enough to avoid brush strokes. You could also wax and buff them, or use UV resin if you prefer.
- Drill a hole near the top of each earring using a pin or push drill.
- Thread two jump rings through each hole, then link another two jump rings through the first ones, then another two through the second ones to create a short chain for each earring.
- Use a jump ring to link an earring wire to each chain.
Suggested links
If I have missed something, or you still have questions, please leave a comment below.
You can like my Facebook page or join the Jessama Tutorials Polymer Clay Community on Facebook to stay up to date with more polymer clay tutorials like this one as they are released.
You may also like:
You are here: Home >> Polymer Clay Earring Tutorials > Black Poppy Polymer Clay Earring Design


Please leave your comments below: