You are here: Home >> Polymer Clay Bib and Collar Necklace Tutorials > Easy Collar Necklace
Easy Polymer Clay Collar Necklace Tutorial
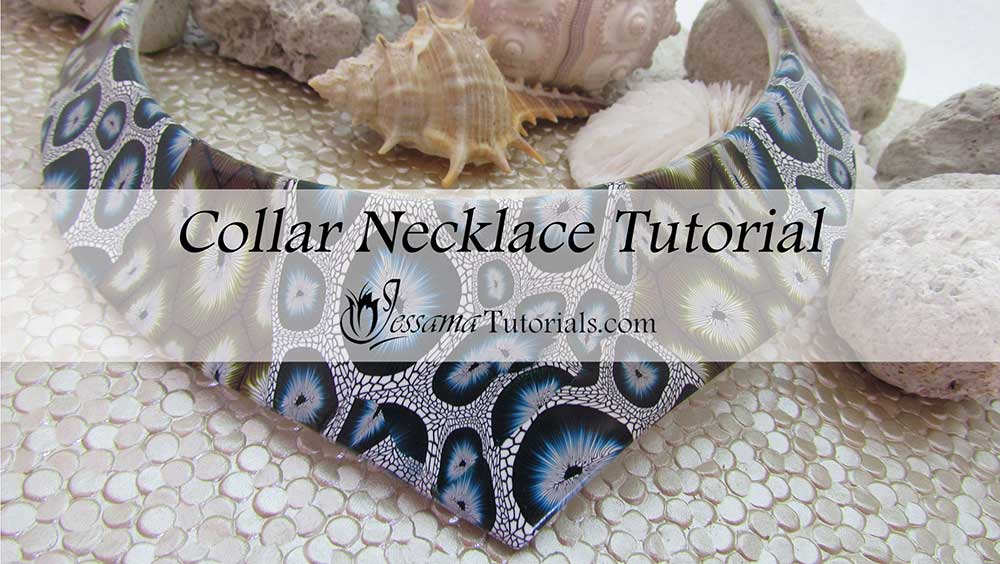
In this tutorial we'll be making an easy but stunning polymer clay collar necklace.
I'll show you tips and tricks to get the shape just right, how to bake it so that it sits beautifully on the neckline, as well as how to achieve a smooth satin sheen.
You will be able to take this simple polymer clay technique, and with some practice, make striking collar necklaces using any cane, veneer or even surface effect of your choice.
You will need the following supplies:
- Pearl white polymer clay
- A veneer or cane to
decorate your polymer clay collar (I’m using my Coral Cane)
- A collar cutter (See JessamaDesign on Etsy)
- A tissue blade
- A pasta machine
- An acrylic roller
- An oven
- A necklace stand or mandrel (The stand can’t be plastic)
- A spray bottle filled with water
- A heat gun
- A texture sponge
- A pin drill
- Sandpaper or polishing cloths
- A soft cloth
- Renaissance wax
- Four jumprings
- Chain
- A clasp
- Flat nose pliers
How to Make My Easy Polymer Clay Collar Necklace Step by Step
Making the Raw Polymer Clay Sheet- To start with, you will need a sheet of pearl white Premo rolled out on the thickest setting of your pasta machine.
- You will also need a cane or veneer. I'll be using my Coral Cane today.
- To make this project so much easier, I'll be using one of my collar cutters from JessamaDesign. Today I'm using the pointed one, but there is also a basic curved shape available if you prefer. You can also use a template if you have one.
- Curve your sheet of clay into an arc.
- Mark, but don't cut, your clay using your cutter. Place this aside for now.
- If you are using a cane, slice off enough slices to cover the collar shape.
- Apply your cane slices, or your veneer, to the marked area on the pearl white clay and smooth it down.
- Gently roll flat using your acrylic rod until there are no seams remaining.
- Add more cane slices if the surface is uneven.
- Use your blade to lift the clay from your work surface.
- Replace it and smooth into place.
- Place your cutter or template over the clay where you would like to make your cut and cut out your collar necklace.
- Remove the excess clay and lift up your cutter.
- Carefully lift up your collar piece with your blade.
- Lay your clay piece on your mandrel or stand. You can also use a metal bowl if you like, but the stand I use gives a good shape.
- Heat your clay with a heat gun to set the surface.
- Gently clean up the edges using a craft knife or needle tool.
- Scrunch a cloth into a ball and then cover with another one to form the shape of a neckline.
- Remove your set collar piece from your stand, and lay over your cloths so that the shape is supported.
- Bake for a full hour at your brand's recommended temperature.
- After baking, put the collar back on the stand while it is still hot and shape it carefully.
- Starting with the two ends, spray the polymer clay with water while you hold it in place. Keep spraying until the clay has cooled and set in shape.
- Dry up most of the water, then remove the collar and dry your stand properly and put aside.
- Take a second sheet of pearl white clay and curve it as before. Use your cutter or template to cut out a backing.
- Lightly cover the back of your collar with an even film of Bake and Bond.
- Place the backing that you cut out over the bake and bond and push out to the sides, so that there is a small overlap that you can trim up later to form a neat edge.
- Smooth off the back using your fingers.
- Use a blade to trim around the edges and then bevel and smooth the edges with your fingertips.
- Texture the back using a texture of your choice. I'm using a rough sponge.
- Resmooth the edges and fix any little cracks or imperfections.
- Return to the oven on the cloths as before for another full hour and after baking reset on the stand using your water spray.
- Sand your collar starting from the lowest grit all the way through to the highest until you have a nice satin sheen. I start at 400 and go through to 8000. Sand the front and sides and also the back if you want to.
- Apply a light layer of Renaissance Wax using a soft cloth.
- Give it a good buff using a soft cloth or a buffing wheel.
- Leave for ten minutes to let the wax set.
- Use a pin drill to drill a small hole on either side of your collar.
- Thread a jumpring through each hole.
- Take two equal lengths of chain and attach one half of your clasp to each one using a jumpring.
- Thread a piece of chain onto the jumprings on either side of the collar, then twist the jumprings until the join of the ring is inside the collar and invisible.
Suggested links
- Coral Cane Tutorial
- Pointed Collar Cutter
- More Collar Cutters on JessmaDesign
- Display Stand on FireMountainGems.com
- Pin Drill
- Frangipani Cane Tutorial
- Cherry Blossom Cane Tutorial
- Tutorials on Patreon
If I have missed something, or you still have questions, please leave a comment below.
You can like my Facebook page or join the Jessama Tutorials Polymer Clay Community on Facebook to stay up to date with more polymer clay tutorials like this one as they are released.
You may also like:
You are here: Home >> Polymer Clay Bib and Collar Necklace Tutorials > Easy Collar Necklace


Please leave your comments below: