Shattered River Polymer Clay Coaster Tutorial
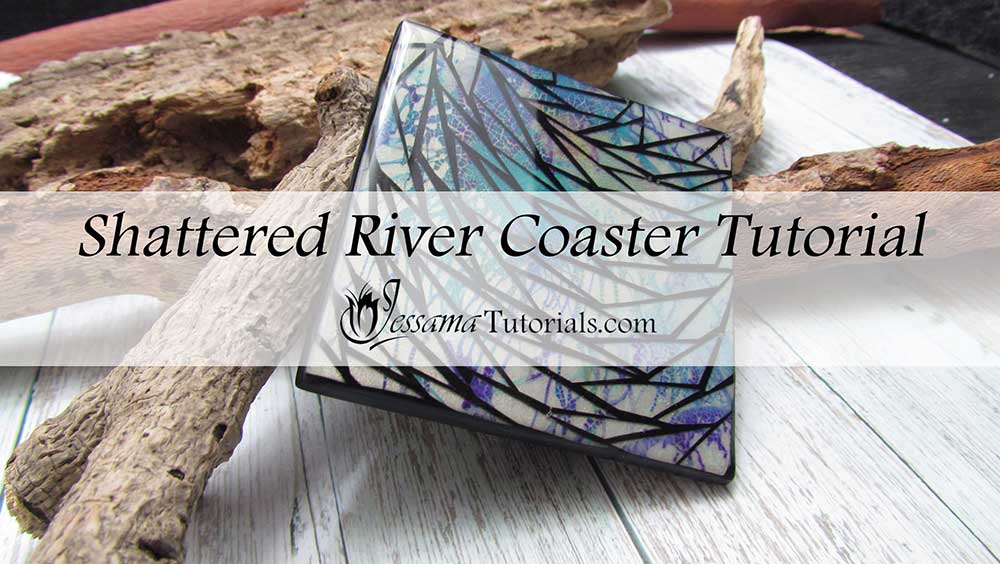
In this tutorial we will be making a polymer clay coaster using a cool mosaic effect. I'll be showing you how to get a tendril effect using Vintaj Patina Inks and then how to turn that into a mosaic to mimic ice fractures floating on a river.
You can make this coaster in any shape or size you like. You can turn it
into a wall plaque or a pendant. You can also leave out the mosaic
effect and just make something using the Vintaj Patina Ink pattern. You
can try different colors too. Have fun and see what you can come up
with.
You will need the following supplies:
- White translucent, black, pearl white Premo polymer clay
- Vintaj Patina ink (Marine, Deep Turquoise, Lapis, Cobalt)
- Oven
- Pasta machine
- Tissue blade
- Acrylic roller
- Square maxi set
- 99% alcohol
- A wet wipe
- A straw
- Craft knife
- Polishing Papers
- Ice resin
How to Make The Shattered River Polymer Clay Coaster Step by Step
- To start with, you will need a sheet of pearl white polymer clay rolled out on the middle setting of your pasta machine.
- Cut out a large square from your clay. I used one of my Maxi Square Cutters from my shop JessamaDesign.
- I will be using Patina Inks - Lapiz, Marina, Cobalt and Deep Turquoise. Give your inks a good shake before use.
- Start with Lapiz. Add a small drop to your clay and blow with a straw.
- Repeat with the other colors.
- Continue adding drops until your clay is sufficiently colored and then set it aside to dry.
- Roll out a sheet of premo white translucent clay on the thinnest setting of your pasta machine.
- Lay it over your Patina clay, trim up the excess and smooth over to eliminate air bubbles.
- Roll through the pasta machine on the thickest setting. Rotate, go down one setting and roll again. Repeat until you get to the second thinnest setting.
- Cut out a large square from your clay, choosing the part of the pattern that you like the best. I used the largest cutter from my Maxi Square Cutters. (6.5 by 6.5cm)
- Bake for 20 minutes at 90 degrees celcius between two tiles and printing paper. When it comes out it should be brittle.
- Trim the piece down to the size of the second smallest maxi cutter. (5.5 by 5.5cm)
- Roll out a sheet of black polymer clay on the thickest setting of your pasta machine, and mark a square on it using the largest maxi cutter. (6.5 by 6.5cm)
- Use your craft knife or tissue blade to trim triangles from your patina piece and re-lay them over your black clay. (See the video for details.)
- Gently roll over it using your acrylic roller to stick the baked pieces into the black base.
- Cut out using the largest square.
- Rearrange the pieces if necessary.
- Press them down to make sure that they are properly stuck.
- Bake for an hour at the recommended temperature covered with a plain piece of paper.
- When cool fill in the gaps by smearing small soft balls of black Premo into the cracks, and shaving with your tissue blade.
- Finish of the sides by smearing soft black clay around them using the Jessama Smear Technique.
- Burnish while covered with a piece of plain printing paper and clean by wiping with alcohol spray. The better you clean it up, the less sanding later.
- Bake for another half an hour at the recommended temperature.
- Give your coaster a good sand working all the way from your lowest to your highest grit. I go from 400 to 8000.
- Buff using a soft cloth or a rotary buffing tool if you have one.
- Measure out your Ice Resin. I use a plunger to make sure that the measurements are accurate.
- Mix thoroughly but gently - around five minutes.
- Lay your coaster on a silicone resin tray and drip the resin into the center using a skewer. Don't over-fill it. Add a bit at a time and stretch it out towards the edges. Add more until the resin domes
- Blow gently through a straw to pop the bubbles.
- If you have any stubborn bubbles, you can warm the resin up gently with a heatgun to pop them.
- Allow to cure for 24 hours.
- Check out my Ice Resin Tutorial for more information.
Suggested Links
- Maxi Square Cutters
- More Maxi Cutters
- The Jessama Smear Technique
- Buffing Wheels
- Polishing papers
- How to avoid rippling your clay
If you are struggling with the Ice Resin, you can find a full Tips and Techniques tutorial that walks you through the process on my Patreon community page or in my Etsy Shop.
If I have missed something, or you still have questions, please leave a comment below.
You can like my Facebook page or join the Jessama Tutorials Polymer Clay Community on Facebook to stay up to date with more polymer clay tutorials like this one as they are released.


Please leave your comments below: