You are here: Home >> Polymer Clay Necklace Projects > Necklace with Jellyroll Mokume Gane and Faux Lava
Making Polymer Clay Jellyroll Mokume Gane and Faux Lava Jewelry
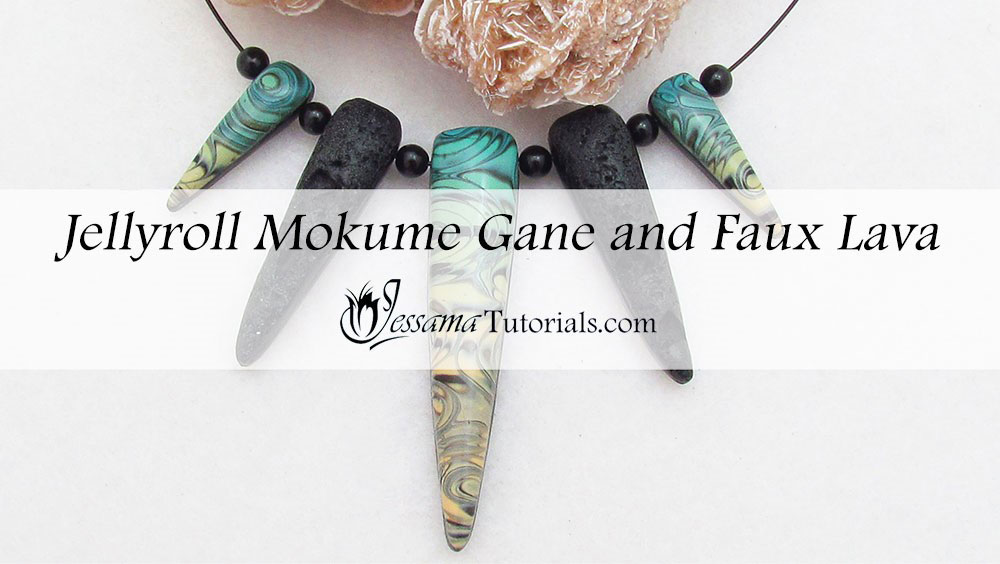
In this tutorial we'll be making polymer clay drop pendants using the Jellyroll Mokume Gane technique. I'll also show you how to make Faux Lava to go with it and we'll string it all together to make a beautiful piece of polymer clay jewelry.
Before watching this video, please watch my Jellyroll Mokume Gane Tutorial. It is an
essential part of this polymer clay project. You’ll find the links in the box
below the video.
You will need the following supplies:
- A Jellyroll Mokume Gane sheet
- Black polymer clay
- Salt, coarse and fine
- A pasta machine
- An acrylic roller
- A tissue blade
- An oven
- A plastic bag
- Cookie cutters (I'm using a long dagger shape)
- Coarse grit sandpaper
- Wet/dry sandpaper/ polishing papers
- A hand drill
- A cloth
- Renaissance wax
- A clasp
- Two jumprings
- Two crimps
- Two charlotte crimps
- Six 4mm Onyx beads
- Black accu-flex beading wire, 49 strands, softest drape.
- Chain nose pliers
- Flush cutters
Making Polymer Clay Jellyroll Mokume Gane and Faux Lava Jewelry Step by Step
Making Polymer Clay Jellyroll Mokume Gane:- To start you’ll need your Jellyroll Mokume Gane Sheet. This should be as thick as the thickest setting on your pasta machine.
- Place it on top of a sheet of black clay that was rolled out on the thickest setting of your pasta machine. Smooth it to remove air bubbles. Trim away any excess.
- Roll out a sheet of black on the thickest setting of your pasta machine. Trim away any ragged edges.
- Sprinkle fine and coarse salt over the top of the black clay. Press the salt into the black clay and roll flat with your acrylic roller.
- Place the sheet of black over another sheet of black rolled out on the thickest setting. Your sheet should be twice the thickness of your thickest setting on your pasta machine.
- Rip a ziploc plastic bag in two so that you only have one layer of plastic. Smooth the plastic over the top of your clay and cut out your bead. The plastic will cause the clay to dome.
- Cut out three shapes from the Jellyroll Mokume Gane and two from the Faux Lava.
- Trim away the edges of the pendants to tidy them up. Smooth the edges too.
- Roll out a sheet of black on the second thinnest setting of your pasta machine.
- Texture one side with a piece of coarse sandpaper. I’m using 40 grit sandpaper.
- Flip the sheet of black so that the texture is facing down. Bring over your pendants and place on top of the black.
- Cut out the backing to the shape of the bead. Do this for all the pendants. Make sure to smooth off the edges.
- Bake the beads for an hour at your brands recommended temperature.
- Take the lava beads and dump them in a tub of warm water. Let them sit until the salt dissolves. This will leave the holes associated with lava rock.
- Finish off the edges of the pendants using the Jessama Smear.
- Bake them again for half an hour at the recommended temperature.
- Once cool, sand your Jellyroll pendants. I start with a 400 grit sandpaper all the way up to an 8000 grit. Don't sand the lava.
- Drill the pendants through their sides using a hand drill.
- Give each a pendant a light coat of Renaissance wax and a good buff with an old rag or a dremel tool.
- Let the pendants dry for around an hour before stringing on accu-flex with black onyx beads.
- Cut a length of accu-flex. I like 16” long. String on a charlotte crimp and then a crimp. Leave a small tail of string and then squish the crimp. Bring the charlotte crimp back up and close it around the crimp. Open a jump ring and link that through the hole in the charlotte crimp. Put your clasp onto the jump ring and close the ring.
- Now you’re set to string. Start with an Onyx bead, then Jellyroll, Onyx, Lava, Onyx and so on until all of your pendants and beads have been strung.
- To finish your polymer clay necklace just repeat the steps with the charlotte crimps and clasp above.
In the video tutorial I show a lot of different tips and tricks to help get the most out of the process, so please do take a look at that.
Suggested links
supplies
If I have missed something, or you still have questions, please leave a comment below.
You can like my Facebook page or join the Jessama Tutorials Polymer Clay Community on Facebook to stay up to date with more polymer clay tutorials like this one as they are released.
You may also like:
You are here: Home >> Polymer Clay Necklace Projects > Necklace with Jellyroll Mokume Gane and Faux Lava


Please leave your comments below: