Making Polymer Clay Jewelry - Desert Flower Necklace
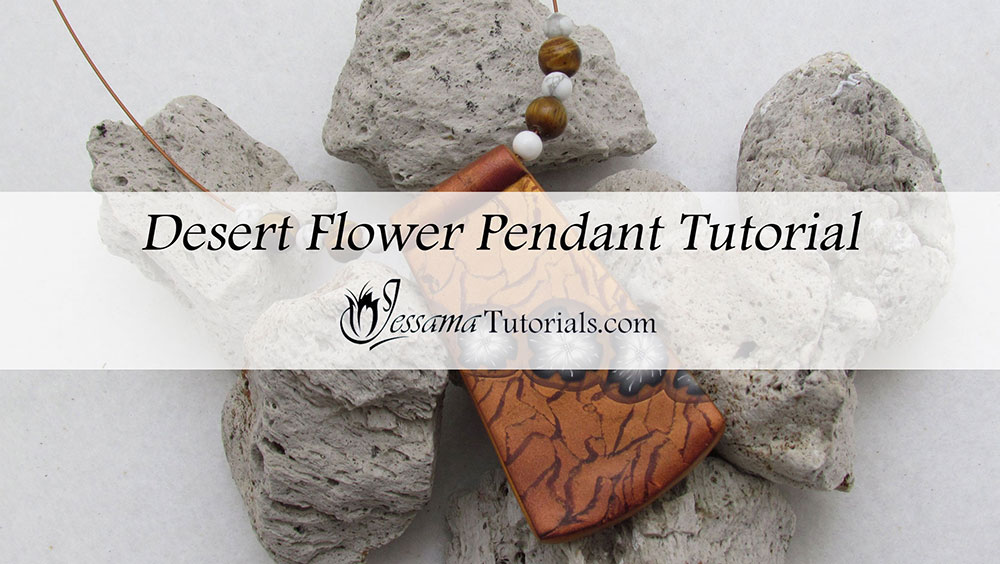
In this tutorial, we will be making polymer clay jewelry by combining the Dragonscale Mica Shift technique and a black and white Flower Cane into a beautiful Desert Flower Necklace with a cool bail idea.
The techniques and ideas in this project can be used across many different designs, so be sure to try this project out using different canes and veneers too.
Before watching this video, please watch my Dragonscale Mica Shift and Black and White Flower Cane Tutorials. They are the base for making polymer clay jewelry using this design. You’ll find the links in the box
below the video.
You will need the following supplies:
- A dragon scale mica shift sheet
- A black and white flower cane
- A tissue blade
- A pasta machine
- An acrylic roller
- A cutter (I'm using one from my Cleopatra set)
- Gold polymer clay
- 6 White Howlite round 4mm beads
- 4 Tiger Eye round 6mm beads
- An antique copper clasp
- 2 antique copper jumprings
- 2 antique copper crimps
- 2 antique copper charlotte crimps
- Copper accu-flex beading wire, softest drape, 49 strands, 0.024 inch diameter
- Renaissance wax
- An oven
- Sandpaper/ Polishing Papers
- A skewer
- A drill
Making Polymer Clay Jewelry - The Desert Flower Necklace Step by Step
Setting Up:- To start you’ll need a cutter with at least one flat side. Examples of shapes that would work are Squares, Rectangles and Triangles for example. Shapes that wouldn’t work are Circles, Footballs and Ovals for example. I'm using one from my Cleopatra set.
- You’ll also need a Black and White Flower Cane and a Dragon Scale Mica Shift. I’m using a gold and bronze Dragon Scale Mica Shift.
- Slice thin slices from your flower cane. The thinner the better.
- Take your flower pieces, pat them back into a round shape, and place them down the middle of your dragon scale mica shift veneer. Don’t overlap them.
- Use your acrylic roller to gently flatten the flowers. Roll in all directions to keep the flower slices from distorting. Lift the sheet from your work surface using your blade.
- Take your cutter and cut out a piece with the flowers at an angle. Gently trim the sides. Put this piece aside for now.
- Cut a piece out of a second Dragon Scale Mica Shift that will fit the width of your pendant. You need to trim it so that it fits your pendant exactly, but leave an extra piece at the top. We will be rolling this over to make the bail. See the video for details of this process.
- Lay the piece on your work surface so that the best side is facing down.
- Place your pendant piece with the flowers, over the piece you just cut, and line it up so that only the extra top strip is showing.
- Now take a skewer and wrap the leftover strip around the skewer so that you end up with a bail on the flat top of your bead. Slide the skewer out of the bail. See the tutorial for details.
- Trim the sides of the pendant so that it’s nice and neat. Smooth away any finger prints.
- Place the pendant in the oven for a full hour.
- Once cooled you’ll need to smear the sides of your pendant with gold polymer clay using the Jessama Smear Technique.
- Smear a little into the spot where your bail meets your pendant.
- Wipe away any finger prints and bake for another half an hour.
- Now you’re ready to start sanding. Sand all the way from a 400 grit to an 8000 grit to get a nice high shine.
- Finish it off with a thin layer of renaissance wax and allow to dry for about 10 to 20 minutes.
- Drill the bail hole through with a hand drill to make sure your bail is clear.
- Start by placing your charlotte crimp on one end of your accu-flex and attach half of your clasp to that using a jumpring.
- Now string on your chosen beads and pendant.
- Finish off the necklace the same way you started.
In the video tutorial I show a lot of different tips and tricks to help with making polymer clay jewelry, so please do take a look at that.
Suggested links
- Dragonscale Mica Shift Technique
- Black and White Flower Cane
- The Jessama Smear Technique
- Cleopatra's Collar Polymer Clay Cutters
- How to Make a Cobble Stone Cane with the Scrap Cane Ends
If I have missed something, or you still have questions, please leave a comment below.
You can like my Facebook page or join the Jessama Tutorials Polymer Clay Community on Facebook to stay up to date with more polymer clay tutorials like this one as they are released.


Please leave your comments below: