How to Seal Polymer Clay With Resin - Questions and Answers
How to Seal polymer clay with resin
In this article I'll address the most common questions around how to
seal polymer clay with resin, some of the problems people have, and how
to fix them.
Resin is great for
sealing polymer clay. It’s the least likely of all the sealants to react with
your surface effects. It can be a bit tricky to use, but once you get over the quirks of your
particular polymer clay resin it is really worth the effort. With a bit of patience you can achieve the most wonderful professional finishes.
Click here for a bullet point summary...
If you've never used resin with your polymer clay before, and you're not sure which one to use, I discuss which ones are best and why in my article: Which Polymer Clay Resin Should I Use? You can also take a look at my Ice Resin Video Tutorial where I go through the process of using resin step by step.
Why Is my resin still sticky?
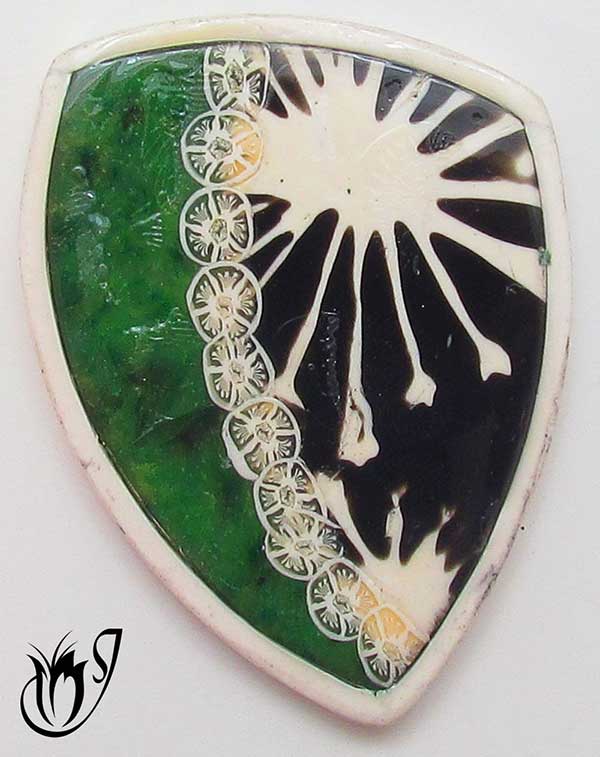

- Always measure your resin with pin point accuracy. Use a measuring cup. All too often I see people measuring resin by eye. While this might work with one part resins, it doesn’t work with two part resins or resins that need a catalyst. Always use an accurate measuring receptacle.
- Make sure you mix your resin for long enough. Scrape the edges of your cup
and mixing stick to incorporate any stragglers. I tend to mix for at least five minutes.
I don’t use quick set resins where you only have five minutes to work with it.
I like having at least half an hour to work. Have a look at the resins I recommend if you're not sure which one to use.
- Make sure you're curing the resin correctly. Some resins require you to use a UV lamp or direct sunlight. If you haven’t exposed them to either they won’t cure. Only some resins need this, but just make sure before leaving your project to cure on your work surface.
- Most resins hate moisture. Getting water in the resin is a recipe for disaster. Some resins are more tolerant than others but the best way to avoid problems is to make sure your polymer clay bead is bone dry and that you don’t include any moisture during the curing process.
- You'll find detailed instructions and more tips in the Ice Resin Video Tutorial.
How to seal polymer clay with resin without it pooling around my bead
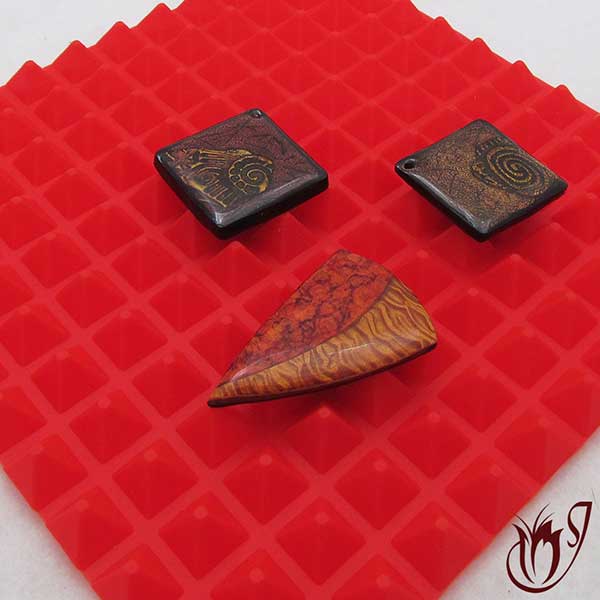
When I first started learning how to seal polymer clay with resin, I came across a problem I call 'stuck fast'. I would
lay my polymer clay beads out on a tile or newspaper to prevent messes. I would come back after
the curing process and low and behold some of the resin had slipped over the edges
of my beads and had now cured on the tile or newspaper. Of course, this meant that my beads were well and truly stuck. It caused endless problems. But there’s a really easy way of preventing
it. I’m still kicking myself for not thinking of this sooner.
Simply place your polymer clay bead on a surface with raised bumps of some kind (preferably
silicon). The resin will drip off the bead and pool in the grooves between the bumps, curing in its own puddle away from your project. Once cured simply pick your bead up off of the curing surface. You
can turn your bead upside down and scrape off any residue.If you use a silicon curing mat, the cured resin peals off of it really easily. I got mine for a few dollars on eBay.

Why has my resin gone yellow?
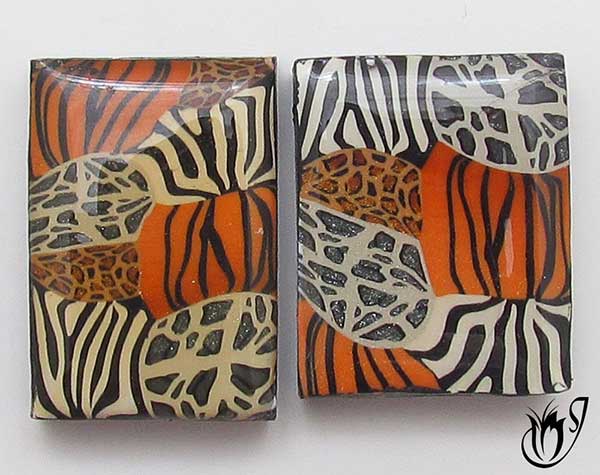 You can see that the bead on the left has a yellow tinge compared to the one on the right. They are made of exactly the same canes. The tinge is the result of the burnt resin.
 You can see that the bead on the left has a yellow tinge compared to the one on the right. They are made of exactly the same canes. The tinge is the result of the burnt resin.
This only
happened to me once when I left my resin outside in the sun for too long. I was in a hurry to finish my project and I didn't feel like waiting, like I normally do, for my resin to cure overnight. I was so annoyed! But - I learned a valuable lesson about how to seal polymer clay with resin...
If resin gets too hot, it starts to burn and turns yellow - and ugly. This problem only happens on
really hot days so just keep a watch on your resin if you’re letting it cure
outside in direct sunlight and the temperature is a bit high.
How to seal polymer clay with resin and keep my bead hole open
This is another
problem I encountered at the start of my resin and polymer clay journey.
When I applied my resin it pooled into the holes I had made with my beading awl and clogged them up. I was
constantly having to go with a pin and wiggle it into the hole to keep it open. Between that and the stuck fast problem, I was pulling my hair out! But once again, I found that there is a really simple solution that I wish I had realized much earlier.
I made two important discoveries:
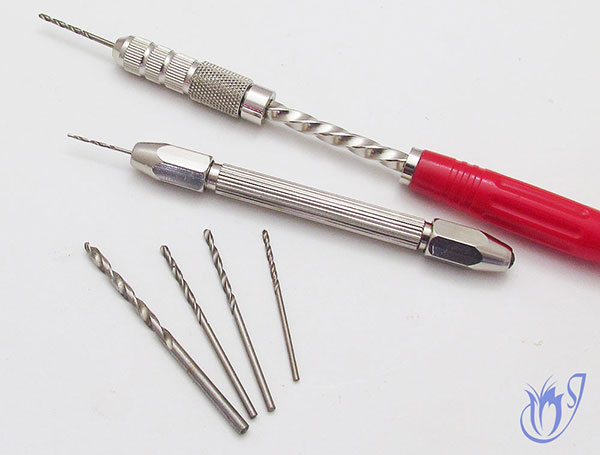
- Drilling my beads after baking wasn't as hard as I thought it would be. I had avoided drilling for the longest time, simply because I was scared of the drill! But I found that drilling polymer clay doesn’t require a motorized drill. There’s such a
thing as a hand held drill, and its super easy to use.
- I also found that the drill bit goes really easily through the cured resin, leaving a neat professional hole. Now that is something I was not expecting.
So to avoid the resin clogging up your holes, bite the bullet and start drilling your beads after sealing your polymer clay with resin. It’s super easy and gives a great result. I've put together a quick drilling polymer clay tutorial to show you how easy it really is. I
wish I’d known about the hand drill when I first started.

There are ways to keep bigger holes open if they are an integral part of the design, but it's a finicky, messy process!
How to seal polymer clay with resin without air bubbles
Another problem that you may encounter when you first learn how to seal polymer clay with resin is air bubbles. They can get into the resin while you're mixing it and they ruin the perfect, glass finish you are looking for. Well don’t worry. There are a few ways to get rid of them, but prevention is better than cure. So...
- The number one tip I can give is to mix your resin slowly. This is why I’d rather use a resin with a longer working time. It allows me to take five minutes to mix my resin slowly, instead of scrambling to mix it quickly before it starts to set.
- When you mix your resin, make sure you never let your mixing stick lift from the bottom of the cup you’re using, unless you’re scraping edges or wiping the stick off.
Remember, slowly does it with
resin. We get so busy with all of our projects, and sometimes we are in such a hurry. This is one place when you really just have to take a deep breath and take your time.
Okay so you’ve mixed your resin slowly and you’ve avoided most of the air
bubbles, but you still have a few small nuisances floating about. So what to do about it?
Just pour the resin onto your beads
as normal. By the time you've finished pouring the whole batch, the resin will have sat for a little while and
the bubbles will have risen to the surface. Now you just have to pop them.
Grab
a straw and gently blow across the surface of your bead. See the bubbles
starting to pop? Wait for a minute and then blow again. Repeat this process for about ten minutes. This should get rid of all the bubbles.
The Ice Resin Video Tutorial goes through this process in detail if you are stuck.
TIP: I always recommend sealing your polymer clay with resin in batches (around ten beads or more at a time). The more resin you are mixing, the easier it is to get the measurements correct. Mixing up a tiny amount of resin for only one or two beads is very difficult to do accurately, and if you mix a larger amount and you only have a couple of beads, you will end up wasting quite a bit. Resin is quite pricey, so batching your beads makes sense.
how to seal polymer clay with resin without losing my texture
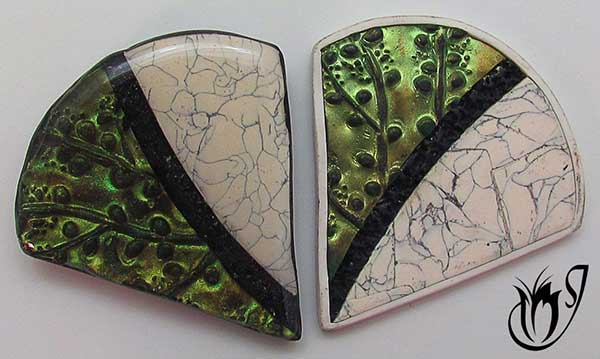 You can see that the texture on the left-hand bead, which has been covered with resin, is less obvious than the one on the right because of the glassy reflection. Although you really can't appreciate the complete effect in the photo.
 You can see that the texture on the left-hand bead, which has been covered with resin, is less obvious than the one on the right because of the glassy reflection. Although you really can't appreciate the complete effect in the photo.
This was one thing I
found out the hard way when I was learning how to seal polymer clay with resin. The beautiful, glassy effect of the resin will almost completely hide the texture you have applied to your clay unless you accent it in some way. If you
plan to pour resin onto texture make sure you’ve highlighted the texture with some form of
mica powder or other mixed media.
The upside to this is that resin hides fingerprints and imperfections in your joins, but that's cheating!
Which resin should i use?
There are quite a few different resins available and it can be confusing trying to figure out which one will be best to use. Since they are a bit more pricey than most polymer clay supplies, it's best to stick to the well tested ones. Check out my article: Which Polymer Clay Resin Should I Use? for a run down of the ones I have found to be the safest and easiest to use.
in summary...
So in summary, here is what you need to know about how to seal polymer clay with resin:
- Sticky resin is usually caused by inaccurate measuring, incomplete mixing, or incorrect curing. It can also be as a result of water having been mixed in somewhere along the way.
- Resin pooling can cause your beads to become stuck to the surface where they are curing. This is easily prevented by using a curing mat with raised bumps. (Preferably silicon as the cured resin peels right off when you're done.)
- Resin turns yellow if it burns. This can easily happen on hot days if it is exposed to direct sunlight for too long. Keep an eye on it.
- If you want to seal polymer clay with resin, it's best to drill your holes after curing the resin. Pre-made holes will clog up and mess up your bead.
- Bubbles can be avoided by slowing down. Bubbles are incorporated during the mixing process, so mix your resin slowly and thoroughly. Remove any stray bubbles from your beads by blowing over them gently through a straw.
- The glassy effect of polymer clay resin will hide any texture on your clay that has not been adequately highlighted. Always add mica powder or other mixed media to textured beads that are going to have resin applied to them.
Tricky but worth the effort
Learning how to seal polymer clay with resin takes a bit of time and patience. I went through quite a bit of trial and error in the beginning. But in the end I found that the results are worth the hassle. No other polymer clay sealer can replicate the professional finish of resin. If you are having trouble, please check out my step by step Ice Resin Tutorial. It's full of tips and tricks to make working with resin hassle free.
Having said that, each polymer clay sealer has its place, so be sure to check out the rest of the articles in this series listed below.
Do you have any other questions or problems with your polymer clay resin? Let me know in the comments below and I'll be happy to add them in.
In the mean time, please like and share with your friends. Let's learn together.



Please leave your comments below: