Polymer Clay Faux Turquoise Tutorial
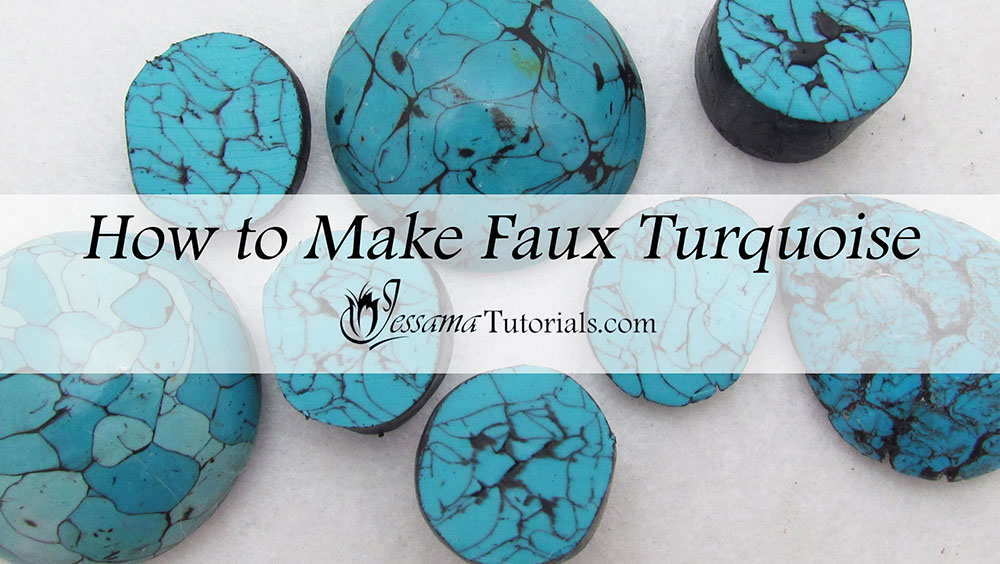
In this tutorial I’ll be showing the faux black veined turquoise technique that uses paint to create the veins. I'll also show examples of other more exotic faux turquoise variations at the end of the video. These include the beautiful African Turquoise - one of my favorites. Real turquoise comes in many different forms, almost too many to count. This leaves endless variations for us polymer clayers to mess around with.
If you are interested in learning how to make faux polymer clay turquoise that goes beyond the basic black vein, I’ll be adding tutorials for many of them on my Patreon page in the near future, so keep an eye out for them. They're really cool - you don't want to miss them.
But for now, let's start with the black-veined turquoise...
You will need the following supplies:
- Turquoise Premo
- Black paint
- A paint brush
- A tissue blade
- An acrylic roller
- A pasta machine
- A cloth to clean up the paint
- A plastic bag
How to Make Polymer Clay Faux Turquoise
-
To start with you’re going to need your chosen color of clay. I’ll be working with Premo Turquoise. Roll it into a thin log with about a 0.5 cm diameter.
NOTE: Don't condition your clay fully for this technique. If you do, your clay will be too soft to work with. You want it almost brittle. This will help with the faux stone effect. - Chop your polymer clay log into chips. You want sharp edges just like real turquoise.
- Separate all the pieces. They need to be separate so that the paint we’re going to use can coat their entire surface.
- Once they’re separated, dump a good amount of black paint onto them. Take a brush and spread the paint all over the chips. You want a fair bit of coverage. If you find that small clumps have formed, take your brush and gently break them apart.
- When you're happy with your coverage, pop the polymer clay pieces into a plastic bag. Get them all into the corner of the bag and start twisting just above the clump to push all the pieces together. This will force all that paint into the gaps and create even more veins.
- Once it’s nice and tight and you think it’s all together, snip open the bag and take out the lump of clay.
- Leave your polymer clay to dry for an hour or two while you clean up the paint. An hour should be long enough for it to dry to the touch. The inside of the lump will usually still be wet. You don't want it to be dry right through.
- Roll the lump into a cylinder. You need to do this before the paint completely dries otherwise the clay will be too hard to mold.
- Now comes the hard part of this polymer clay technique - patience. Leave your polymer clay cylinder to dry for a day or two to let the paint set completely. No peeking!
- When you can't wait any longer, cut your polymer clay log open and see the faux black veined turquoise inside. You can slice your log up and use it to make all sorts of black veined turquoise beads and jewelry.
If you have any questions, please leave a comment below.
You can like my Facebook page or join the Jessama Tutorials Polymer Clay Community on Facebook to stay up to date with more polymer clay tutorials like this one as they are released.


Please leave your comments below: