You are here: Home >> Faux Polymer Clay Tutorials > Faux Red Tiger Eye
Faux Red Tiger Eye Tutorial
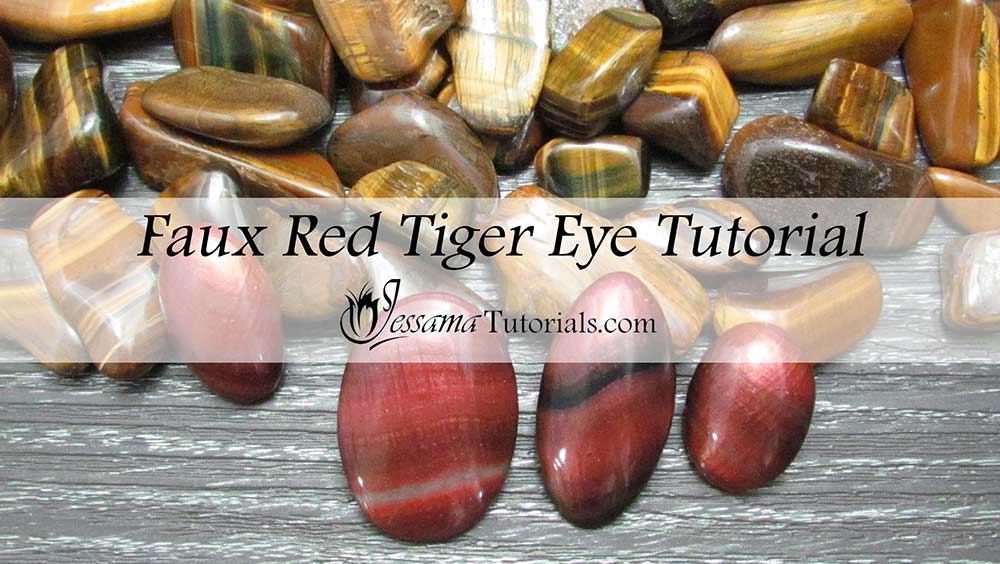
In this tutorial I’ll be showing how to make faux red Tiger Eye, and how to make cabochons with it. I'll show you a few different versions with various color combinations and striation patterns, since no two stones are the same.
In part two of this tutorial, we will use the Red Tiger Eye sheet to make a beautiful lariat necklace.
You will need the following supplies:
- Black, cadmium red, gold, translucent and bronze Premo polymer clay
- A tissue blade
- A pasta machine
- An acrylic roller
- An oven
- Plain printing paper
- A piercing pin (or needle)
- A cabochon mold
- Polishing Papers
- Translucent kato liquid clay
- A heatgun
- A buffing wheel
- A dremel
How to Make Faux Red Tiger Eye from Polymer Clay
Preparing the Clay-
You need five colors of Premo polymer clay mixed according to the following recipes:
- Color 1: 20 translucent, 12 bronze, 1 cadmium red, 8 black
- Color 2: 20 translucent, 12 bronze, 1 cadmium red, 4 black
- Color 3: 20 translucent, 12 bronze, 1 cadmium red, 2 black
- Color 4: 20 translucent, 12 bronze, 1 cadmium red
- Color 5: 20 translucent, 12 bronze, 1 cadmium red, 4 gold
- Roll these colors out on the thickest setting of your pasta machine. You will also need a sheet of black and Premo translucent.
- Turn each sheet into logs.
- Take about an inch of each log and roll it into a snake as thin as you can make it.
-
Lay them next to one another in the order of one of the patterns below:
- 1,3,2, translucent, 4,5,4 translucent, 3,4, translucent, 2,1,4,5,3 translucent, 1,2, translucent, 3,5,4,3 translucent, 1,2,1,3, translucent,4,3,5,4, translucent, 3,4,2
- 1,3,4,2,1, translucent, 3,2,4, translucent, 3,1,2,3, translucent, 4,2,1,3, translucent, 2,3,4,2
- 1, black,1,2,4,3,1, black, translucent, 1,3,4, translucent, 2,1 black, 1,3,4,2, translucent, 3,2,1, black, 2,1
- Fold your sheet in half and roll it flat with your acrylic roller.
- Run it through the pasta machine on the thickest and then the middle setting.
- Fold in half again and rerun through on the middle setting.
- Repeat until the colors just begin to blend into one another. Usually three to four rolls will be enough.
- Use a needle tool to drag perpendicularly to your Tiger Eye stripes to create streaks.
- Cover with a piece of plain printing paper and burnish using your roller.
- Create gentle folds in your sheet to distort the lines - see the video.
- Cut out enough from your sheet for the donut we will be making in part two of this project and put this aside.
- Roll up some scrap clay from making the sheets or a color similar to the color of the sheets - bronze would work.
- Push your clay into a mold of your choice. Cut away the excess clay and remove it from the mold.
- Cover the scrap clay with your Tiger Eye sheet in an off center manner. You don't want your stripes to appear to be parallel or perpendicular to your cabochon shape.
- Put the clay back in the mold and trim.
- Remove from the mold and smooth it off.
- Bake at the recommended temperature for an hour.
- Once cooled, sand starting from your lowest grit (400) up to your highest.
- Buff using a soft cloth or a rotary tool if you have one.
- Cover with liquid clay if you want to.
We will be using this Red Tiger Eye in part two where we will be creating a Lariat Necklace.
Suggested Links
- Part Two - Red Tiger Eye Lariat
- Desert Jewel Gold Tiger Eye Tutorial
- Patreon Liquid Clay Varnishing Tutorial
- Debbie Crothers Liquid Clay Tutorial
- Gold Tiger Eye Tutorial on YouTube
Buy Supplies
If I have missed something, or you still have questions, please leave a comment below.
You can like my Facebook page or join the Jessama Tutorials Polymer Clay Community on Facebook to stay up to date with more polymer clay tutorials like this one as they are released.
You may also like:
You are here: Home >> Faux Polymer Clay Tutorials > Faux Red Tiger Eye


Please leave your comments below: