You are here: Home >> Polymer Clay Bracelets and Cuffs > Faux Coral and Lava Tutorial
Faux Coral and Lava Polymer Clay Bracelet Tutorial
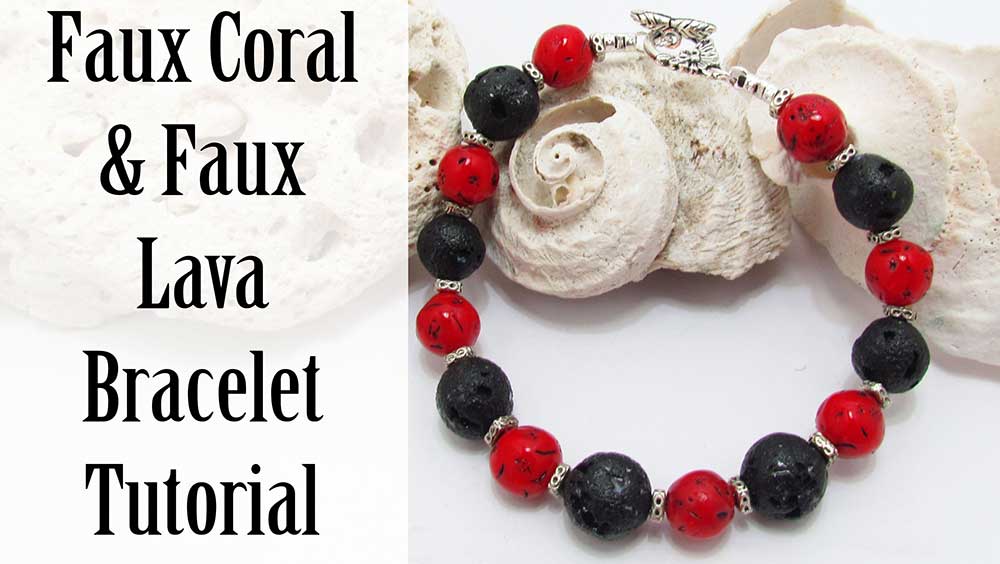
In this polymer clay tutorial, I'll be showing you how to make Faux Coral and Faux Lava from polymer clay. These are two of the simplest faux techniques, but the results are realistic and beautiful.
In this project we will be making a simple bracelet. Be sure to check out part two for the matching Boiling Bubbles Pendant.
You will need the following supplies:
- Cernit Polymer Clay (black, orange, x-mas red, translucent)
- Coarse Salt
- Coarse Sandpaper
- Piercing pin
- Scratching tool
- Black paint
- Pin drill
- A pasta machine
- A tissue blade
- An acrylic roller
- An oven
- Varathane (or other varnish)
- Wire
- Gloves
- Leather Cord (black)
- Cord ends
- Silver spacer beads
- Clasp
- Jumprings
- Pliers
How to Make My Faux Coral and Faux Lava Bead Bracelet
Preparing the Faux Coral-
CERNIT COLOR RECIPE:
- 1 x-mas red, 1 orange, 12 translucent
- Marble your clay together fairly well until you can barely see the lines of individual color.
- Roll into a sausage about 1cm in diameter and slice it up into roughly 1cm pieces. Put about a third aside for next week's project.
- Roll your pieces into balls.
- Use a scratching tool or piercing pin to make marks and scratches on the balls.
- Roll out a sausage of black Cernit clay about 1cm in diameter and slice it up into roughly 1cm pieces.
- Roll your pieces into balls.
- Fill a small container with rock salt.
- Squish the salt around each ball until some of the salt crystals lodge in the clay.
- Roll your balls between two pieces of coarse sandpaper.
- Move to the side.
- In the video I show how to make a faux coral rondelle for next week's Boiling Bubbles pendant project.
- Bake all the beads for an hour on a piece of tissue at Cernit's recommended temperature.
- While still hot, put the lava beads in warm water for about 30 minutes to dissolve the salt.
- Meanwhile, antique your coral beads with black or dark brown paint. Rub the paint all over each bead. As you finish each one, place it on a wet wipe. Leave to dry.
- When dry, rub them around inside the wet wipe to remove most of the paint. Repeat with a clean wet wipe. Leave to dry again.
- Remove your faux lava beads from the water. Dry them off, and inspect to make sure all of the salt has been removed.
- Drill through your coral and lava beads. Drill most of the way from one side, then swap to the other side.
- Drill two of the lava beads with a bigger hole ready for the pendant project.
- String all of your polymer clay beads onto a piece of wire ready for varnishing.
- Dip your beads into your Varathane. Move it around a bit to get the varnish into the gaps. Allow to drain, then hang up to dry.
- String your beads, alternating Coral, spacer, Lava and spacer, onto a piece of leather cord.
- Crimp a cord end onto one end of your cord.
- Move your beads to the end, trim your cord and add a second cord end.
- Attach your clasp to either end using a jumpring.
Suggested Links
Supplies
If I have missed something, or you still have questions, please leave a comment below.
You can like my Facebook page or join the Jessama Tutorials Polymer Clay Community on Facebook to stay up to date with more polymer clay tutorials like this one as they are released.
You may also like:
You are here: Home >> Polymer Clay Bracelets and Cuffs > Faux Coral and Lava Tutorial


Please leave your comments below: