You are here: Home >> Faux Polymer Clay Tutorials > Faux Agate Geode
Faux Agate Geode Polymer Clay Tutorial
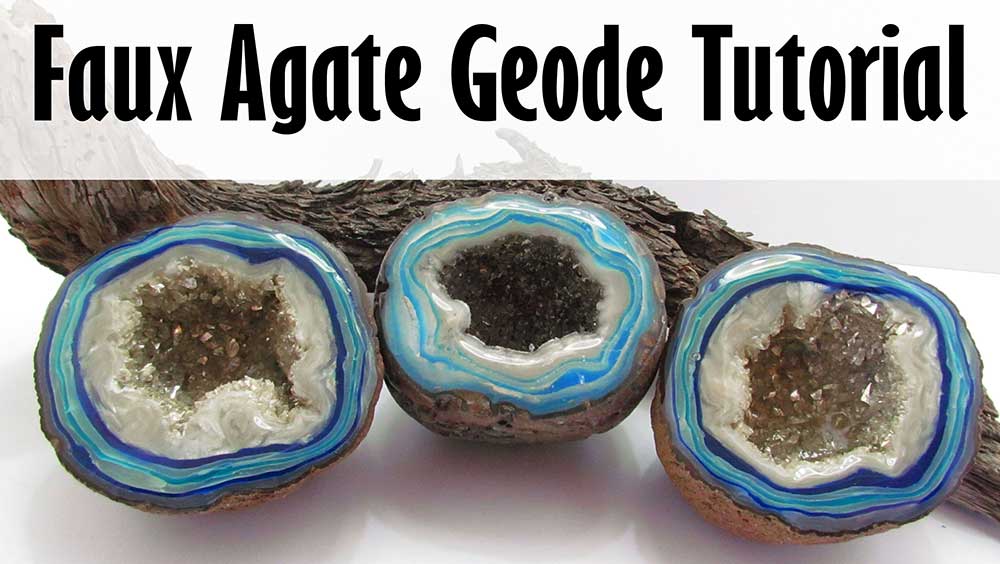
In this polymer clay tutorial we will learn how to make a Faux Agate Geode with a hollow druzy covered center.
There are lots of new techniques in this project. It's much easier than it looks and plenty of fun, so I hope you enjoy it.
You will need the following supplies:
- Polymer clay (Cernit translucent, sapphire, turquoise and antique bronze)
- Polymer clay (Premo pearl white)
- A tissue blade
- A pasta machine
- An acrylic roller
- An oven
- Metal druzy (silver)
- A ball tool
- Piñata ink blanco blanco ( or white paint)
- Translucent liquid clay (Kato)
- Salt
- Sandpaper
- Polishing papers
- Paint ( yellow ecru, burnt umber, raw sienna, white)
- A paint brush
- UV resin (Magic Gloss)
- UV lamp
How to Make a Faux Agate Geode from Polymer Clay
- I will be using Cernit translucent, Sapphire, Turquoise and Antique Bronze.
- To start you need salt - a mixture of coarse and fine, translucent Cernit and Pearl white Premo.
- Chop a piece of translucent and pearl white finely and mix together.
- Squish your pieces together well, making sure to eliminate air bubbles.
- Flatten your ball into a thick slice - about 0.5cm thick.
- Scoop a good pile of salt into the middle.
- Fold together to enclose the salt. Try to eliminate as much air as you can.
- Pinch the edges to seal and trim away the excess.
- Gently form into a round. Don't worry about folds as long as they aren't too deep.
- Use a ball tool to smooth out creases.
- Roll out a sheet of Cernit Sapphire as thin as you can get it.
- Place your ball on it, seam down, and wrap the Sapphire around the ball trimming away any excess. Cover any gaps with another small piece of Sapphire.
- Compress your ball and smooth the creases again using a ball tool.
- Cover the ball with a layer of White Pinata ink.
- Allow to dry.
-
Then continue covering as follows:
Translucent, white ink, turquoise, white ink, translucent, white ink, sapphire, white ink and translucent - allowing the ink to dry each time. - Roll out a thin sheet of Cernit Antique Bronze, and wrap around as the final layer.
- Roll your ball in a bowl of coarse salt to texture the outside.
- Gently mold into an oval shape.
- Bake for an hour and a half in the salt.
- Allow to cool until you are able to comfortably handle the clay.
- Rinse in water to remove the outside salt.
- While still warm use a sharp blade to slice the faux Agate geode in half.
- Tip out the salt and wipe it away.
- Bring over your acrylic paints - a range of browns, black and white, and mix up some browns that you like. Thin down with water if necessary.
- Use a coarse brush to dab paint on the outside of the polymer clay geode.
- Allow the paint to dry.
- Use your finger to clean the salt out of the middle.
- Use a brush to coat the inside of the geode with Kato translucent liquid clay. Make sure you get into all the nooks and crannies and give it a good coating.
- Run your finger over the rim to remove any excess liquid clay.
- Hold your geode over a bowl and tip your silver druzy inside the geode.
- Run your finger over the rim again to clean it up.
- Bake again for another hour.
- Sand the rim using wet/dry sandpaper, starting from a 400 grit to 1200.
- Polish using polishing papers, starting from 600 to 8000.
- Buff using a rotary buffing wheel or a soft cloth.
- Stand your geode up on a raw ball of clay so that the top rim is level.
- Apply Magic Gloss to the rim.
- Use a skewer to pull it to the edges.
- Place in the UV lamp for 30 minutes.
Suggested links
Where to Buy Supplies
If I have missed something, or you still have questions, please leave a comment below.
You can like my Facebook page or join the Jessama Tutorials Polymer Clay Community on Facebook to stay up to date with more polymer clay tutorials like this one as they are released.
You may also like:
You are here: Home >> Faux Polymer Clay Tutorials > Faux Agate Geode


Please leave your comments below: