Amoeba Bulls Eye Cane Polymer Clay Tutorial
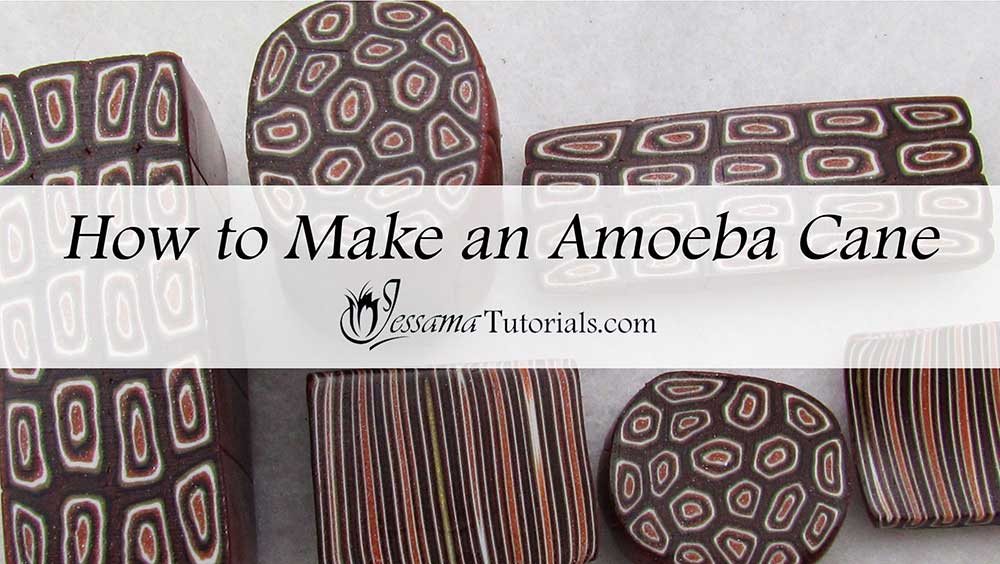
In this polymer clay tutorial I’ll be showing you how to make a Wrapped Bulls Eye Cane and how to use that to create three other complex canes including what I call an Amoeba Cane. It’s a versatile technique that can be done in many different color combinations.
When you've finished making your Amoeba Cane, play around
with the canes some more. You’ll be able to make many more variations than the ones shown in
the tutorial.
I also used this cane in a previous Mokume Gane tutorial called the
Rippling Bulls Eye technique, so take a look at that too if you are interested.
You will need the following supplies:
- Polymer clay (I’m using Premo 18k Gold, Copper, White, Black and Bronze)
- A tissue blade
- An acrylic roller
- A pasta machine
Steps To Making Complex Polymer Clay Bulls Eye Canes
- The first step is to get all of your polymer clay ready.
- You’ll need a bunch of different, but co-ordinating polymer clay colors. Today I’m using Premo 18k Gold, Copper, White, Black and Bronze.
- Roll each of these into a sheet on the thickest setting of your pasta machine and then you’re ready to create your wrapped bulls eye cane. This will be the base for your complex canes.
- Choose one of the colors to be the center log of your cane. I’ll be using the Copper.
- Now wrap the other colors around the center log in this order; White, 18k Gold, Black, Bronze, Copper, White, 18k Gold, Black and finally Bronze.
- Now you’ve got a nice big polymer clay cane to work with. You need to reduce it down to about 1cm in diameter by pinching the sides and rotating. (See the video for the technique.)
- Then cut the log in half. Put one half aside.
- Cut one half of the log into lengths of about 3cm.
- Lay ten of these logs side by side.
- Cut in half lengthwise and put one half on top of the other.
- Take half of these logs and place then on top again so that you end up with a stack of four by five logs.
- Square up the cane by pushing the logs together using your work surface. This will eliminate air bubbles.
- Use your roller to flatten your cane out a bit so that you end up with a long rectangular shape. Your round logs will have also squared somewhat.
- Put this cane aside to cool and rest.
- Take the second half of your original bullseye and cut it in half again. Put one piece aside.
- Take the remaining piece and reduce it randomly. (You do not want an even reduction - see the video for instructions.)
- Cut this log into small 2cm equal lengths.
- Piece these small logs together randomly, similarly to a lace cane.
- Gently squish and pinch together to form a round shape. This is the Amoeba Cane.
- Put this cane aside to cool and rest.
- Take the remaining wrapped bullseye cane log and reduce to about half a centimeter in diameter.
- Cut into small 2cm lengths.
- Stack them together to form a square cane.
- Square up your cane.
- Reduce it into a rectangular shape. Chop off the untidy ends.
- Cut the rectangle in half and mirror one half next to the other.
- Squish together to form a square cane.
- Put this cane aside to cool and rest.
In the video tutorial, I show you different ways of slicing the canes to achieve a different effect, as well as, some examples of the same canes in different colors. So be sure to check that out too.
suggested links
If you need more information on reducing your canes, take a look at my reducing polymer clay canes tutorial, where I show how to reduce round, square, triangular and hexagonal canes correctly.
If I have missed something, or you still have questions, please leave a comment below.
You can like my Facebook page or join the Jessama Tutorials Polymer Clay Community on Facebook to stay up to date with more polymer clay tutorials like this one as they are released.



Please leave your comments below: