Baking polymer clay - questions and answers
Introduction
With all the work it takes to put together a beautiful polymer clay creation, you would think that baking it would be the easy part. Yet baking polymer clay is without doubt the single topic that generates the most questions across polymer clay communities and forums around the globe. It just isn't that simple. In fact it's downright finicky. And annoying.
In this question and answer article I hope to put most of those questions to rest. I've covered everything I can think of but if I've missed any, let me know in the comments and I'll add them in.
Click here for a bullet point summary...
Do I have to bake polymer clay?
Okay. First things first. Yes, you do have to bake it. Polymer clay isn’t an air dry clay and will only be fully cured when it’s baked in an oven. If you’d like a walk through on baking polymer clay from start to finish please have a look at my step-by-step article: How to Bake Polymer Clay.
What’s the right temperature to use when baking polymer clay?
You’ll find
the recommended temperature for your specific brand of polymer clay on the
packet. This is the right temperature to use when baking it. The recommended temperature varies from one brand to another.
If you want to mix more than one brand of clay together in a project, find
the mid-point between the two recommended temperatures so that your polymer clay cures without burning or under-baking.
How long Should I bake polymer clay For?
Polymer clay needs to be baked for at least 35 minutes to give the clay time to cure. However, baking polymer clay for longer will increase its strength. As long as your oven temperature is correct and your
pieces are protected with a tent, you can bake for virtually as
long as you like. Many polymer clayers like to bake their pieces for a minimum of 1 hour to make sure that the clay is strong enough, so this would be a good guideline.
However, remember to take into account multiple bakings. If your piece is going to be baked more than once at different stages of putting it together, it should be sufficient to bake it for 35 minutes on the first round.
How do I keep My oven temperature stable?
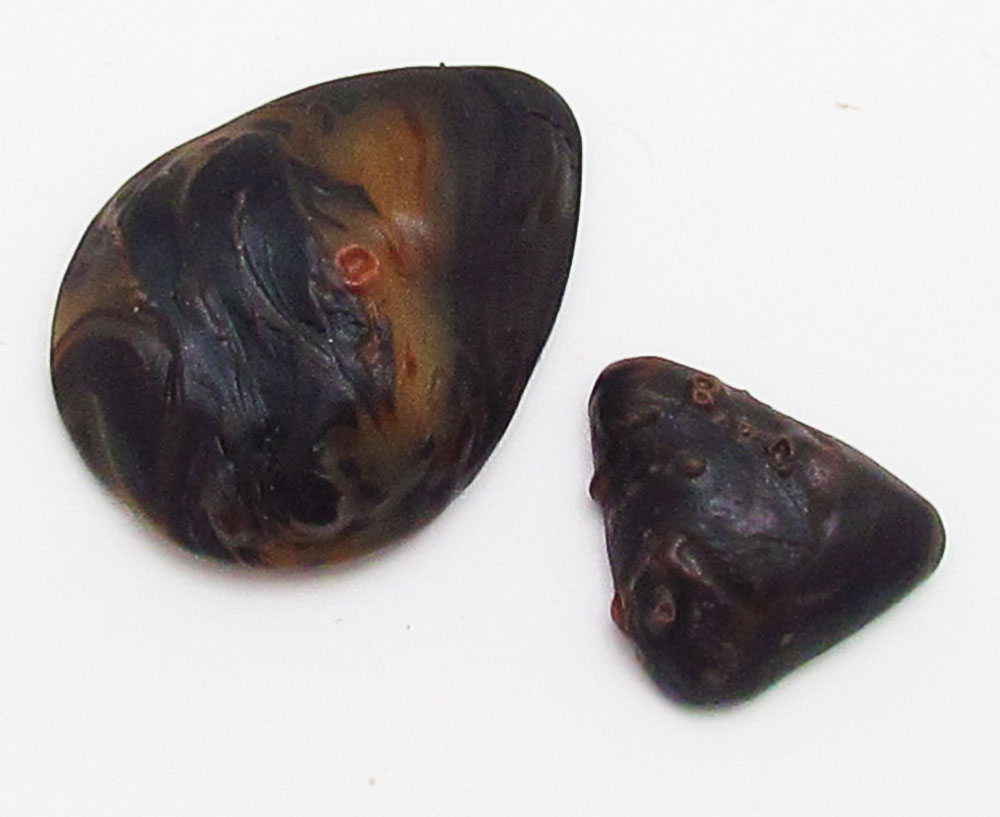 As you can see these beads are horribly burnt. This was the last time I ever baked on a metal tray!
One of the most annoying things when it
comes to baking polymer clay is when your oven decides to do a jig. Rising and
falling oven temperatures can cause burning or under-baking, ruining your wonderful project.
 As you can see these beads are horribly burnt. This was the last time I ever baked on a metal tray!
Tips to Keep Your Oven Temperature Stable:
My absolute number one tip is to put a ceramic tile on your oven shelf. Use the biggest one that will fit in your oven. The tile will stabilize the temperature and at the same
time provide a flat surface to bake your polymer clay.
Tip number two is to avoid putting metal in
the oven. The metal will cause spiking (rapidly rising and falling temperatures) and your polymer clay beads will suffer for it.
- Remove any metal trays from your oven. Leave only the shelf that you will be baking on.
- Bake your clay on a piece of plain paper on top of the tile you’ve put
in your oven. This will also protect the bottoms from scorching.
- Use paper or cardboard to tent your clay rather than a foil container.
- Bake your round beads on a bed of tissue and drill them after baking rather than using metal piercing pins.
Always be sure to use plain, unlined paper. The ink from the lines can transfer to your clay during the baking process!
Always be sure to use plain, unlined paper. The ink from the lines can transfer to your clay during the baking process!
How do I prevent shiny spots?
Shiny spots are caused by baking polymer clay directly on a tile or other hard surface. The side that rests on the tile gets flat, shiny spots wherever the clay is most in contact with the surface. This is easily prevented by baking your beads on a piece of plain printing paper or a bed of tissue resting on top of the tile.
Scorching while baking polymer clay
Sometimes you’ll find that your polymer
clay beads will come out of the oven with a brownish tint ranging from a slight
yellow to a dark burn depending on how bad the scorch was. This happens when
the oven you are using (a toaster oven in my case) has open elements that send
direct heat onto your polymer clay. Even if you have the right temperate, your
beads can still get scorched.
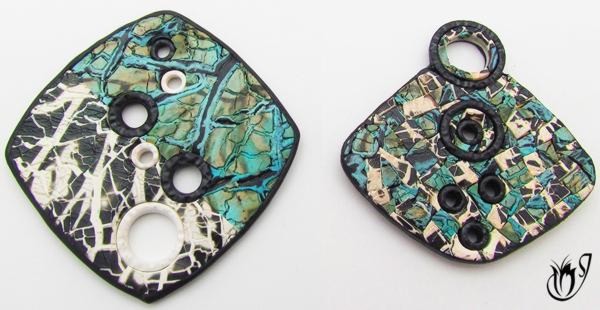 These beads were created using the same clay sheets. You can see that the bead on the left is whiter than the one on the right which is slightly scorched.
 These beads were created using the same clay sheets. You can see that the bead on the left is whiter than the one on the right which is slightly scorched.
How to Prevent Scorching:
- Place your baking shelf in the middle of the oven, as far away from the
heating elements as possible - not too near the top or the bottom.
- Never, ever bake your beads upside down. Bake them so that your pattern is facing up and the back of your bead is facing down. The surface of the bead most likely to scorch is the one facing the baking surface.
- If you have flat beads the best way to protect them is to place them on a plain piece of paper on a tile to protect the back and to cover them with a plain piece of printing paper to protect the front.
- Other more dimensional beads
should be placed on your tile on a bed of tissues and covered with a tent made from cardboard. If you can fit a small box into your oven
this is ideal. If not you can always make your own.
White and translucent clays are particularly susceptible to burning, so be extra careful with those. I have also found that some brands scorch more easily than others. Premo and Cernit seem to be the troublesome duo!
White and translucent clays are particularly susceptible to burning, so be extra careful with those. I have also found that some brands scorch more easily than others. Premo and Cernit seem to be the troublesome duo!
Broken polymer clay
Sometimes
your polymer clay beads will break even after you’ve baked them. This can be very frustrating but is preventable.
Preventing Broken Beads:
- Always be careful when removing polymer clay from the oven while it’s hot. The beads are very fragile during this stage and will break easily. Plunging your beads into some cold water will speed up the cooling process and will shorten the time where your beads are at their most vulnerable.
- Make sure that your oven temperature
is correct. If the temperature is too low your polymer clay will not cure properly. Improperly cured clay is very weak and brittle, and susceptible to breaking.
- Certain polymer clay brands are more brittle than others. These include Sculpey Original and Sculpey III. These brands will break very easily even when they’re baked properly. I don't recommend using them. Brands such as Cernit, Kato, Premo, Fimo and Pardo are far more reliable.
- Make sure you’re baking your clay for long enough. Half an hour
isn’t long enough for most beads. A full hour is the best way to make sure your
beads are cured properly. Remember to use a tent to prevent scorching.
A good way to test if you are baking your clay for long enough, and at the right temperature, is to put a test chip in the oven with your finished piece. When your baking time is up, remove the test chip and bend it. If it is flexible, you know that you have baked your piece for long enough. If it snaps, put it back in the oven with your finished piece for another half an hour, and retest. You may also need to adjust your temperature.
A good way to test if you are baking your clay for long enough, and at the right temperature, is to put a test chip in the oven with your finished piece. When your baking time is up, remove the test chip and bend it. If it is flexible, you know that you have baked your piece for long enough. If it snaps, put it back in the oven with your finished piece for another half an hour, and retest. You may also need to adjust your temperature.
Flexible polymer clay beads
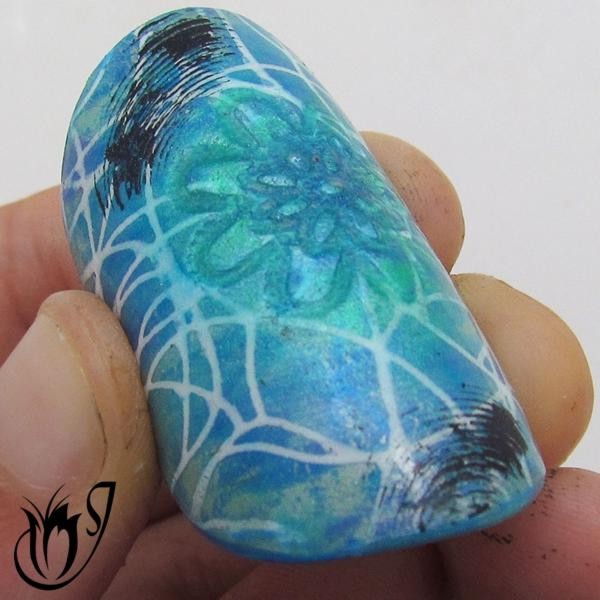 Polymer clay beads should be bendable if they are baked correctly.
Should
polymer clay be flexible after it’s been baked?
Well the short answer is yes, as long as your bead is under 1cm in thickness. Anything thicker won’t be
very flexible. Polymer clay is supposed to be flexible if it’s baked properly. It is a plastic after all.
 Polymer clay beads should be bendable if they are baked correctly.
Under-baked polymer clay won’t be bendable. It will be brittle and easy to break. So if you can bend your beads without them snapping, like the one in the photo, then you’re baking polymer clay the right way.
Bumps, mumps and air bubbles
Air bubbles are the mortal enemy of polymer clayers. They seem to come out of nowhere and completely mess up the beautiful, smooth appearance of your project. Fortunately, there are a few ways to prevent these menaces from showing up to ruin your day.
Tips:
- Rule number one when working with polymer clay is to never let air into your clay. This means when you condition it you have to be extra careful. Please have a look at my tutorial: How To condition Polymer Clay to find out how to do it correctly.
- If you see air bubbles that have managed to infiltrate your clay, slit them with a blade and gently smooth the air out of the clay before you bake it.
- Being careful how you handle your raw clay is the best way to prevent air bubbles, but the odd one here and there is inevitable. I recommend baking flat projects on a piece of plain paper resting on a tile, covered with a second plain piece of paper and a second tile to weight the bead down. This doesn't prevent air bubbles entirely, but it can dull the effect.
Can I use cornstarch to help with baking polymer clay?
You can use cornstarch to help with baking polymer clay, but there are a few things you should know before trying it out. I cover this in my article: Baking Polymer Clay with Cornstarch and Baking Soda, so be sure to check it out.
You Crack me up!
Have you
ever taken polymer clay out the oven and noticed thin cracks along the
surface? Pretty annoying right? Can you believe that the cause is usually something as innocent as water?
Any water that becomes embedded in your raw clay while you are working with it, turns to steam in the oven, expands and bursts out of your bead creating a crack. So try to avoid
using water with polymer clay as much as possible. If you must use it, wipe away as much as you can before baking and then wait at least an
hour before putting your polymer clay in the oven. This will give the water
time to evaporate.
Cracks can also occur when there are not enough plasticizers in the raw clay. This can be caused by a few things:
- Over-leaching your clay.
- Letting it rest in cornstarch for too long before baking, or
- Letting it sit
on paper for too long.
Any of these mistakes can make the clay dry and brittle. Polymer clay placed on paper or a bed of cornstarch should be baked immediately to prevent excessive leaching.
in summary...
So to summarize, here are the answers to most of the obstacles you may encounter when baking polymer clay:
- Polymer clay only cures with baking. It is not an air-dry clay.
- Bake your clay using the temperature recommended by the manufacturer on the packet.
- If you are combining brands in one project bake at the mid-point temperature.
- Bake your clay for at least 35 minutes. 1 hour is a good guideline.
- Stabilize your oven temperature by placing a ceramic tile in your oven and removing all metal other than your baking shelf.
- Prevent shiny spots by baking polymer clay on a piece of plain paper.
- Prevent scorching your polymer clay by placing your baking shelf in the middle of your oven and by tenting your beads.
- Prevent breaking beads by ensuring that you bake at the correct temperature for long enough. Under-baked beads are brittle and break easily. Don't use Sculpey Original or Sculpey III.
- Properly cured polymer clay should be flexible like plastic.
- Prevent air bubbles by taking care not to introduce air while conditioning your clay.
- Cracks are usually caused by water in your clay, or clay that has been over-leached.
Happy Baking
I hope I've managed to answer all of your questions. If I missed any please let me know in the comments below.
Don't forget to check out my
step-by-step article: How to Bake Polymer Clay, if you’d like a walk through
on baking polymer clay from start to finish.
As always, please like and share!





Please leave your comments below: